Friday, March 13, 2015

A little Spring Fever

I love the Linnie Blooms Garden Flags.  They are just the right size for you to create a masterpiece on and then hang outside.  If you are worried about it getting weathered, simply apply a coat of sealant to it before hanging it out.
            

I hope you have a Fantastic Friday!

Creatively yours,

Linda

Tuesday, March 10, 2015

Hoops can be fun


Hi Everyone,

Welcome to my first post for Linnie Blooms. This past January I was introduced to Linnie Blooms at CHA(while doing a make & take) I went to Linda's booth to tell her I was in love with her style and products. My first project is with a hoop and I laughed- I always knew these from my mom's embroidery days, I never learned to thread a needle.(SMILE)I arrived at my project while standing on the Monorail ramp looking down into the submarine ride at Disneyland..

 and here we go....             


It begins with the oval kit 3x5 with cut to size canvas fabric, it has a natural base, which I sponged to a dark brown.
Linnie Blooms has both Oval and Round Hoops
 
 I took from the "Flutter" mask/stencil (6pcs positive/negative) one of the pieces reminded me of a fish (my husband said owl) and the piece, that would be the owl's branch. I used scraps from misc scrapbook paper (Kaisercraft) and added them as  mosaic style. The branch looked like coral to me and I painted it all over the canvas with a variety of product.


Upon adhering the canvas to the hoop I added a half of a canvas butterfly for a mermaid tail, the top hoop as the bra part (other half of butterfly) I added gold yarn for hair (sorry didn't have red)

 *The gold bubbles are glue dots dipped in glitter


I learned that these hoops make great shadow boxes and also are perfect for dioramas.


Thanks for letting me share.


Friday, March 6, 2015

SUNFLOWER GIFT BAG TAG

Hello Everyone!  I'm Beth Watson and I am so excited to be here on the Linnie Blooms blog sharing my first Design Team project. 

I met Linda this past January at the Craft and Hobby Association trade show where she was showcasing her line of pre-cut canvas shapes, stamps, masks and stencils and WOW was I blown away!  Such a great idea for mixed media and all of the work is done for you - GENIUS!  And what a great name for her company - Linnie Blooms!

I LOVE sunflowers, so I was immediately drawn to the sunflower mask and stencil.  When working in mixed media the concept of masks AND stencils is so very important, but a lot of companies don't get that!

Now, on to my project!


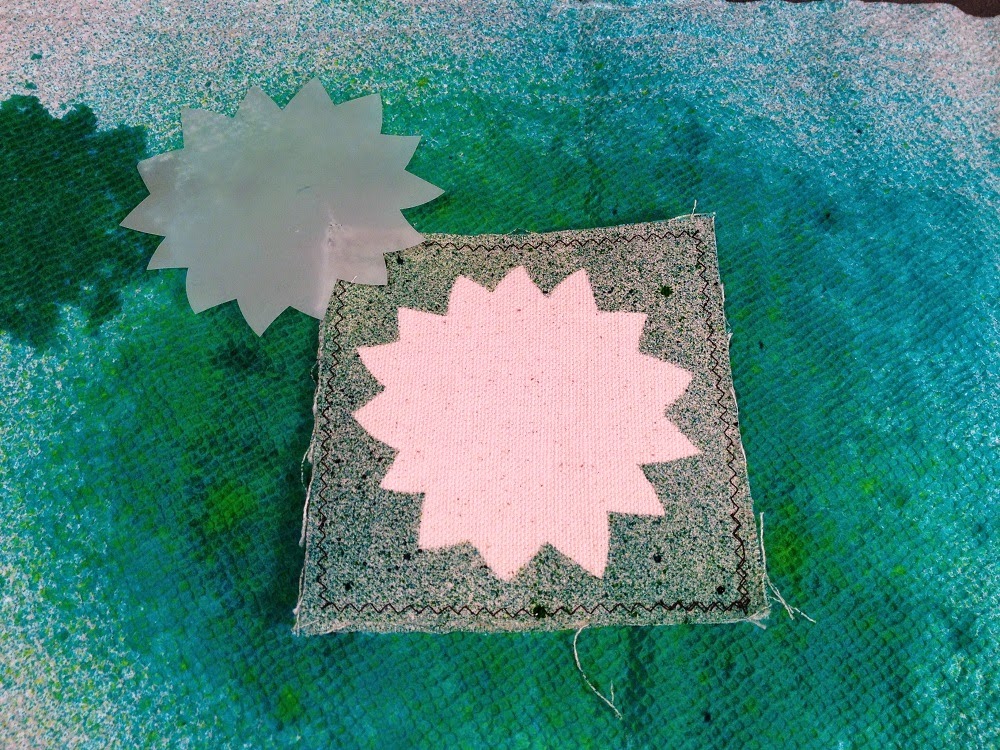
Start with the 5" by 5" Canvas Blank, the Bloom Stencil & Mask and some turquoise spray mist.  Place the mask down, spray then set aside to dry.


 Next, use the stencil and spray with yellow mist, set aside to dry.
TIP:  Use an old copy paper box lid lined with paper towels to spray with mists.  The box lid contains the spray and the paper towels absorb the extra mist which can be used for other mixed media projects, so nothing goes to waste!


Cut leaves from the Canvas Butterflies, then spray with lime green and grass green spray mists.  Make a few lighter and a few darker for contrast, then set aside to dry.

TIP:  The smaller canvas pieces will tend to curl when wet with mists, so once dry, iron them to straighten out.

Once dry and ironed, accent leaves by outlining with Tombow Dual Brush Pen in black (N15). 


Attach assorted black buttons to center of sunflower with Tombow MONO Aqua Multi Glue, let dry.  Accent flower petals and zig zag around edge with Tombow Dual Brush Pen in black (N15).


Decorate bag with Stitched Greetings Clear Stamp Set and black archival ink in a random pattern.  Accent with leaves created by coloring in the Bloom Stencil & Mask with Tombow Dual Brush Pens bright green (173), then outline in black (N15).


Mix leaves with loops of Shabby Trim in green and attach to sides of Canvas Blank with Tombow MONO Aqua Multi Glue, let dry.  Attach gift tag to top of bag with Mini Clothes Pins. 


Fill with a wonderful gift and give, give give!

Hop on over to the Linnie Blooms website to check out all of these great products AND like Linnie Blooms on Facebook for more inspiration!

Thanks for stopping by!  -Beth


Wednesday, March 4, 2015

My Natural Dryer


Hello, I m Ann from the Linnie Blooms Design Team and from the blog Annmakes.  Today I have my first project I made for The Linnie Blooms Blog.  I hope it inspires you to make something for your home.


This is the side door off my kitchen that leads outside where we have a clothes line strung from our house to one of the 100+ year old pines in our yard.  I made this whimsical sign as an ode to the warmer weather I hope will get here soon!

To make this I mostly used Linnie Blooms products:

Hoop Kit - Oval

To make this:
I sprayed the base canvas with some Tattered Angels Bahama Blue and let it dry.

Using a bleach pen and a tissue I removed some of the dye to create clouds.


I sprayed the two pennants (Trees) with another Tattered Angels spray in Chalk Board Green, and let those dry.
With the stamp that I  partially inked in black I stamped some faux stitches.  After I used a Green Sharpie marker to draw some grass.

The tree trunks are made from a stir stick which I broke into small pieces and coloured with a Brown Sharpie marker.

 I used a small piece of kitchen string to tie between the two sticks.

 With some glue I adhered the tree trunks, then the tree tops.  I cut out some little flowers from the Linnie Blooms notepad and glued those at the base of each tree.

 The clothes pin was glued in the same way.

I made a label with my Dymo label maker and adhered that to the bottom.

 Once all the items were glued and dried I assembled the canvas into the embroidery hoop and attached some ribbon with a bow to hang.

Other products used:

Beacon Fabri-Tac Adhesive
Sharpie Fine Point markers: Green & Brown
Dymo Label Maker and Dymo tape
Tattered Angels Glimmer Mistin: Chalboard Evergreen & Bahama Blue
Faber Castell Big Brush pen in Black
Piece of string
Wooden Coffee stir stick (recycled)

Thanks for coming over and have fun creating.

Ann from http://annmakes.blogspot.com

For Linnie Blooms http://linnieblooms.com

Friday, February 27, 2015

Greet Visitors with a Cheerful Canvas Hanging!

By Gail Green


Instructions:

BASE: Using black ink, stamp “HOME” on the lower right-hand corner of Canvas Blank. Using Art Dauber, stencil 3 leaves in Pinetree, as shown.  Put stamped Canvas Blank into Color Catcher (or other box). Place Butterfly Stencil in upper right-hand corner and spray with Artichoke; dry completely and iron flat, if desired.

           SHABBY TRIM: Cut a 10” length of Shabby Trim. Using Bloom Stencil, dab leaves onto trim with both green inks; dry.

      WOOD CLOTHESPINS: Spray Artichoke onto 2 clothespins. Wipe off excess; dry completely.
      
      CANVAS BLOOMS: Lightly press one large and one small canvas Bloom into Squash and Pumpkin Pie ink pads. Place into the spray box; lightly spray Bubblegum, Strawberry, Tangerine and Guava on both canvas pieces; dry completely. Dab Mudslide around edges.

     
TO FINISH: Glue Blooms onto Blank with Fabri-Tac, pressing until glue grabs. Using Gem-Tac, add button and pearl embellishments, as shown; dry. Position stamped Shabby Trim and secure in corners with sprayed clothespins.

Your wall hanging is now ready to display!

Materials:

Linnie  Blooms
      Canvas Blank
      Canvas Petal Flower
      Stencils/Masks (Flutter, Bloom, Butterfly)
      Shabby Trim (Peach)
      Stitched Greetings Stamp Set
      Mixed Media Products (Wood Clothespins)
  
Clearsnap
      Stephanie Barnard® Sprays (Banana, Tangerine, Bubblegum, Strawberry, Guava, Artichoke)
      Colorbox® Archival Ink (Mudslide, Wicked Black, Pinetree, Tree Frog, Squash, Pumpkin Pie)
      Art Daubers
      Color Catcher™ (or other empty box for spraying)

Beacon Adhesives
      Gem-Tac® Permanent Embellishing Glue
      Fabri-Tac® Permanent Adhesive

Miscellaneous: Button, pearls or other embellishments of your choice

Visit the Linnie Blooms Page on Facebook and our Board on Pinterest!

Wednesday, February 25, 2015

A Pocket Full of Posies

Hi Everyone....this is Dawn Mattson from Linnie Blooms design team 2015.  I hope this will bring some warmth to those of you longing for Spring. 

I had SO much fun making this sweet  Pocket full of Posies canvas. 

 I used an 8.5x11 canvas, canvas pennants, pockets and flowers from Linnie Blooms

         The paper is from Bazzill Vintage Lace and the flower centers are Tim Holtz Gumdrops.
 I painted the flowers with Gelatos and while they were wet I pulled the center and twisted. Then I dried them with the heat gun being careful so they would keep their form. The side view shows the how they pop up off the page.
 I used the small Linnie Blooms pocket and colored it with Gelatos and then used a sharpie to "stitch" it.  I used Prima bling to make the V on the pocket.
 I used the mini banner pieces from Linnie Blooms and painted them with Gelatos then stamped the letters with Staz-on ink. I left them loose and only glued them on the top to add to the free flowing look. I used Maya Road twine and another little Prima bling on the point.
 Here's the other side view...OH and I stuffed the pocket with cheesecloth so it would puff up.
 A pocket full of Posies....so much fun to make.  I hope you all enjoy it.
Thanks so much....~Dawn

Tuesday, February 24, 2015

Last but not Least...

Meet Karen Sessions:

My name is Karen Sessions and currently I am living in London, England. I spent most of my life in California where I worked as an elementary school teacher and clogging instructor. After marrying, I moved to the UK with my husband eleven years ago. My two loves have been scrapbooking and card making for the past nine years but I have enjoyed a lifetime of creative hobbies including: sewing, ceramics, jewellery making, calligraphy, knitting, and home decor. Coincidently, many of my great loves all begin with the letter "C" crafting, clogging, chocolate, children, & California. I describe my creative style as very embellished, girly, layered, and full of textures. When designing greeting cards, I enjoy using rubber stamps as a vehicle to creating because drawing has never been in my talent portfolio. Creating is my passion and I love to combine randomness into beauty in a unique and wonderful way. My soul longs to create and I hope my love of crafting is obvious in every little detail. Art is what I do and I do it with my whole heart and soul and that is why I called my blog Art & Soul.
www.karensessionsartandsoul.blogspot.co.uk