Showing posts with label Tim Holtz. Show all posts

Friday, August 1, 2014

Believe in the Absurd

Karen N here from Craftily Yours.  This month, here at Linnie Blooms, the design team was challenged to make a project that includes our favorite quote.  Uhh.  I don't have a favorite quote; I've never even given it a thought.  LOL  Sooooo, I pulled out some stamp quotes from Ranger, and I liked this one!


I used a stamp I had from the (now closed) There She Goes line and some BG Serenade paper.  I colored the little fairy with TH Distress Markers and stamped part of the image on Linnie Blooms Canvas Shapes (square) that I had painted through a stencil with Tim Holtz Tattered Rose distress paint.  The whole card is distressed with my Distrezz-it-All.  I really love that thing!

Thanks so much for stopping by today.  Before you go, be sure to check out:

Linnie Blooms Catalog/Shop  

Craftily yours,

Karen


Tuesday, July 29, 2014

Feather Love

Karen N here from Craftily Yours.  I love feathers!  And wow, am I ever in LOVE with the fabulous Linnie Blooms feathers.  Check 'em out...


SO easy to make this card!  I first inked up the canvas feathers with some TH Distress Ink in Squeezed Lemonade.  Then, I used an UmWow Studio mask to add the circles with TH Distress ink in Broken China.  Finally, I added the veins with a TH watercolor marker and edges with distress ink in Vintage Photo.  I added some 3 Girl JAM distressed lace, some Webster's Pages paper, and a flower from my stash.  The paper is all inked and distressed on the edges.  I was trying to figure out what sentiment to use, when I found that card that I got in a surprise package.  I love how the feathers highlight the words....

Thanks so much for stopping by today.  Before you go, be sure to check out:

Linnie Blooms Catalog/Shop  

Craftily yours,

Karen

Tuesday, July 22, 2014

Real Men, Real Heroes

Karen N here from Craftily Yours.  This month, here at Linnie Blooms, the design team was challenged to make a project that is somehow patriotic.  I wanted to try my hand at using a Linnie Blooms 5x5 canvas blank to create a mini wall-hanging.

My son is proudly serving in the U.S. Army, so I knew exactly what stamp I wanted to use from Unity Stamp Co.  Here's a close-up of the fabulous sentiment I chose.


I love that.  After I stamped the sentiment, I used Mr. Hueys (Overdue) and Adirondack Color Wash (Denim) through a couple Tim Holtz layering stencils to create a background.  (I covered the sentiment with a strip of paper to make sure I didn't spray over it.)  I stamped a heart from Unity after coloring it with Tim Holtz Distress Markers and spritzing it with water to create the heart below.  Finally, I added some fabric tape, UmWow Studio star confetti and oodles of Stickles.  With some ribbon as a hanger, here's what the final project looks like.


The final touch was to add some faux stitching and an underline under the sentiment.  (Thanks to my DT sister, Donna K, for that fabulous idea!

Thanks so much for stopping by today.  Before you go, be sure to check out:

Linnie Blooms Catalog/Shop  

Craftily yours,

Karen


Wednesday, June 25, 2014

Birdie Thanks and Stars to Miss You With....

Karen N here from Craftily Yours.

For today's post, I first made a simple card using the bird and leaf shapes from the Linnie Blooms canvas shapes.  I sprayed the bird with Glimmer Mist in spicy mustard and daubered the leaf/wing with Tim Holtz distress paint in spun sugar mixed with Glimmer Mist in party pink to make it a little brighter.


SO easy.  The paper is from MME Indie Chic Saffron.  I distressed the edges with a little Tim Holtz distress ink in walnut and then ran the edges through my Distrezz-It-All.  The lace is from 3 Girl JAM.

The second card today is using the Linnie Bloom canvas stars from the shapes set that I painted and then spritz with some ink sprays.  My son is in the Army, so this card will be sent to him as a "miss you" kind of card.  :)


Thanks so much for stopping by today.  Before you go, be sure to check out:

Linnie Blooms Catalog/Shop  

Craftily yours,

Karen

Saturday, May 10, 2014

Grow where your planted banner

Happy Saturday Bloomers, my name is Jessica LiBasci from Scatter Joy with Jessann! I am so excited to share my first design team post with you! This was a fun project to create using Linnie Blooms Canvas Die Cuts- Blooms.


Ready to see how I made it?? Here we go.....
I began the project using a rectangle piece of chipboard cut to the desired size. I then drew and cut a triangle to create the pennant type tail to my banner.
I then used fun foam adhesive letters to spell out the saying I had chose. 
Once my letters were in place I covered the entire project in gesso.  Once the gesso had dried I used peach Heidi Swapp Color Shine Spritz that can be purchased from Linnie Blooms to spray my background and flower. I used the sunflower canvas die cuts to create the flower. They are so simple. You just cut half way into the center of the flower and then roll one side of the cut creating a spiral. I glued the inside spiral and then on the outside of the spiral with Fabric Fusion. When the fabric fusion had dried I cut the end off the flower spiral to create a bud.


I used a willow spritz to spray my Linnie Blooms leaf canvas die cuts.
For this project I made two leaves and two flowers.

Once my leaves and flowers dried, I glued one leaf at the top of my banner and then a flower on top of it. I chose a small ribbon and created a bow to glue under the flower. 
Next I used two different tapes on my project.


After both tapes were in place I adhered the second leaf and then flower. 
I used the willow spray in green to spray two Tim Holtz grunge board flourishes. Once they dried I cut them and glued them into place.


Next I used my Tim Holtz Spritzer and a Brown distress Marker to add accent to the background.


I finished my project off with a gold marker to create accent dots and my Cropodile to make holes for a ribbon to hang my banner.
I hope you all enjoy the finished product!


Tuesday, February 4, 2014

Help! The Chickens Are Molting

Hi! It's Candy with a 2-page layout to share for Linnie Blooms Designs this month.

I am completely in love with my chickens and I have to scrapbook every little thing they do. When they molt, or lose feathers and replace them with new ones, they look absolutely ridiculous. So, like any good moma, I took lots of pictures and created this layout.

I am also completely in love with the little pockets from Linnie Blooms and I knew one would be perfect for this page.
I started with a stencil from The Crafter's Workshop. I applied it to the pocket with Archival Ink. Then, I used a combination of Distress Inks until I got the right color. I glued down the front flap and then added a little resin button from Melissa Frances. Then, I added a bit of green twine and filled it with some of the feathers I have picked up from the chicken coop.

On the opposite page, I used some Linnie Blooms Canvas Squares and Pennants to create a banner for the title. I colored the canvas pieces with Distress Ink and added plastic letters from Tim Holtz to the top. To create a look of stitching, I topped each piece with tiny staples using the Tiny Attacher.

I love the rustic feel the canvas pieces gave to this layout. What do you think?


Saturday, January 4, 2014

Birthday Bookmark


Today is my birthday, so I decided to create something that was just to make me happy ... a bookmark.
Yes, sometimes I still read a traditional book and need a bookmark to hold my spot.

I started with a blank from Linnie Blooms. This is actually two pieces of canvas sewed together with paper in between.

Then, I decided to try something different. I honestly did not think it would work, so I was ecstatic when it did.

I used an embossing folder and my Big Shot to create this unique texture on the canvas blank. Cool, eh?!

Then, I used the Copic Airbrush System to create a purple gradient.

Next, I used a Wendy Vecchi stencil and Dreamweaver's Glossy Black Embossing Paste to create the flower.

The small words are Tim Holtz rub ons. I also added a stamped word, some ribbon and floss. 

And I learned you can used all of these techniques to decorate a canvas project.

Thanks for visiting! 
Candy Spiegel

Sunday, September 22, 2013

Tim Holtz Fabric Fun

A little clutch made with Tim Holtz fabric and Linnie Blooms butterflies.  Here's a picture of the backside:


So much fun!


If you like the new Tim Holtz fabric, you might want to check out the limited supply of Linnie Blanks that I just added to the shop:)  


Wednesday, September 4, 2013

Wings or a Butterfly?

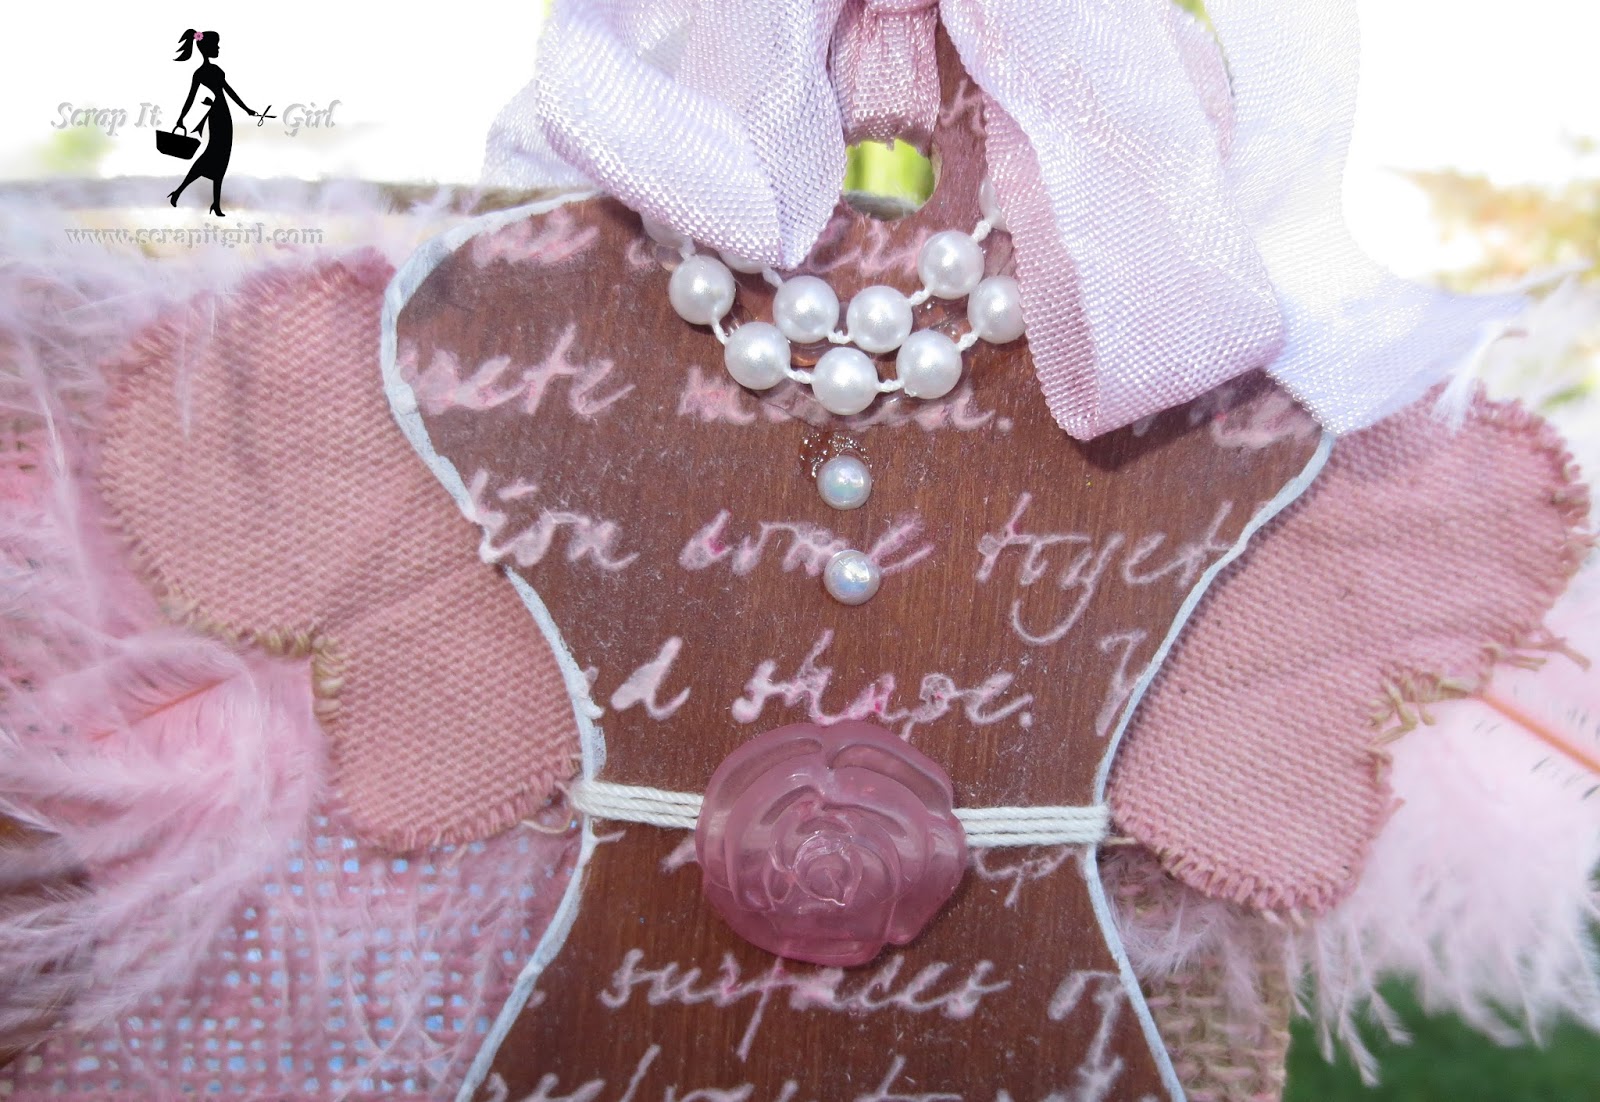
Happy Hump Day!  I am back with a quick post showing you another way to use our wonderful Mixed Media Butterfly Shapes

I just cut it right in half and used it for a set of wings.  Instead of grabbing my gelatos or acrylic paints, this time I used Tim Holtz's Victorian Velvet & Spun Sugar distress inks to color the wings.  I love how the canvas takes the color so easily. 


The wood Dress Form shape comes from Genuinely Jane Studios.  It is a cover to their popular dress form book.  We are doing a Blog Hop with them in October.  You won't want to miss how we will incorporate our Mixed Media shapes with their wood books.  We will have tons of prizes along the hop so please check back for that event.  I will personally be giving away a dress form book and a set of the butterfly's. 

Check out our other blog posts to see what other projects our design team have made. The projects you can make using our Mixed Media Canvas shapes is amazing and endless.  If you want to order your own shapes, shop here.. it's easy and keep in mind these are light weight and can be used on any of your projects!  Start creating with our shapes soon, we have tons of contests and challenges starting and you will need our shapes!

Linnie Blooms Design Team Member & Coordinator Kimberly Congdon, Scrap It Girl