Showing posts with label Feather stencil and Mask. Show all posts

Wednesday, August 12, 2015

Sympathy Cards

For the most difficult times, a handmade card sends much needed comfort.

Directions:
1. Begin to make the background by holding the feather mask firmly in place while gently sponging ink around the edge. Carefully remove the mask, reposition it, and continue sponging. Continue to add more feathers making sure to vary the direction & size of the feather. Also, be sure to place some feathers going off the edge of the paper.

2. Next, make the focal point feather by using the stencil and a darker color ink. Place the stencil down and while holding firmly, sponge the center. To add a bit of shading, use a darker shade of ink around the edge of the stencil and blend it by drawing the sponge towards the center of the feather.

3. Next, add a border strip of embossed feathers. Use a glitter gel pen to add a subtle sparkle to highlight parts of the embossed image. Then add a sentiment of condolence.

4. Finally, stamp a delicate flourish pattern over the canvas feather and add a hint of color by sponging ink along the edge. Lastly, use the stencil to cut a paper feather and embellish the card by forming a cluster using a combination of a real feather, vellum feather, or paper feather.

A Closer Look:


Linnie Blooms Supplies: feather stencil and mask, canvas feather
Other Supplies: pigment ink (Brilliance -Pearlescent Lavender, Purple, Sky Blue, Platinum Planet) (VersaColor - Polar Blue) (Studio G -lilac, rose, acua), condolences sentiment rubber stamp (PSX F-2562), Flourish Background cling stamp (Hero Arts), feather stamp, feather embossing folder (Darice), vellum, sponge applicator, feather, Stardust Glitter Gel Pen (Sakura)
Linnie Blooms
Visit Karen at Art & Soul

Thursday, July 16, 2015

More Mixing and Stitching in my Book

Hello, Ann here today from the Linnie Blooms Design Team and the blog:  Annmakes at (http://annmakes.blogspot.com).  I have a couple of pages from inside my Mini Mixed Stitched Book to share with you that I had a lot of fun working on:


I went to town with some fluid acrylics and  spritzing of beautiful colours from DecoArt and one of their stencils to create the background on the two pages.  Once those layers were dry I used the Feather Stencil by Linnie Blooms to trace onto some pieces of Decou Page Papers several feathers that I cut out with some sharp scissors.  I used DecouPage sealer to glue the feathers to the pages, and I also glued the other embellishments with the same medium.


On a scrap of scrapbook paper I sprayed some more colours and then stamped the sentiment.  That piece was also glued down with the DecouPage.  When everything was dry I used a black permanent ink marker to add the doodles.

I hope that you are inspired to make something.  You can also see my other projects over at my blog.http://annmakes.blogspot.com/2015/07/how-to-make-cute-pages-in-journal-made.html

Thank you so much for stopping by.


Supplies:
Mini Mixed Stitched Book from Linnie Blooms
Feather Stencil Mask from Linnie Blooms
Gold Stag DecouPage paper from DecoArt®
Daisy Chain Stencil from DecoArt
DecouPage™ Sealer-Glue-Finish from DecoArt®
Media Fluid Acrylics from DecoArt® (Cadmium Red Hue, Hansa Yellow Medium, and Metallic Gold)
StazOn Jet Black Solvent Ink from Tsukineko
Stamp  "What I'm Looking For Is a Blessing In Disguise" from Hampton Art--7Gypsies
Black Permanent pen from Sharpie
Archival Seeds in Pistachio and Cherry Kisses from The Robin's Nest
Media Mister from DecoArt® (Orange, Yellow Primary, and Yellow Green)

Thursday, August 14, 2014

Quote Challenge- using masks

Today, I am here to show you my challenge project using a quote. I love using quotes in art work. I collect books just to cut the words out and use in my art.

For today's project I uses the following supplies:

1. wooden block (could use canvas, paper, etc...)
2. Feather stencil/mask
3. acrylic paint
4. paint brush
5. sharpie
6. old book


I took the wooden block and painted and stenciled the whole piece of wood. Once, dry  I took the feather mask layer it down and painted an off white on the whole top. Again once dry added my quote from my book. Then outlined the words and feather with a sharpie. Add dots around the edge.

Fun and simple project. Love that the Linnie Blooms stencils also come with the mask!

Until next time.....be creative!
K Hutchinson


Friday, August 8, 2014

Stencil and stitch your towels

Hey Gang-

I am here today to show you a fun and quick way to perk up your kitchen towels.

Supplies you will need:
1. Linnie Bloom stencil/mask (I used the Flutter stencil and Mask)
2. Crayons
3. DMC floss
4. Iron
5. Pencil
6. Scrap piece of paper
7. Flour sack towel (I used an Aunt Matha's tea towel)


I can just hear some of you saying that you don't stitch now. So, I got a couple of ideas for you. You could use some of the canvas dies and puffy paints. I attached my canvas die flowers with tear mender (love that stuff). The other idea I have for you is to just stencil ( I used the feather stencil/mask) on them in one color. It gives it a real posh silk screen look to it. 


Hope you enjoyed my towels. I would love to see some that you make. 
See you next time.

Happy Creating, 
K 

Thursday, July 24, 2014

Red White Blue Just for You

Hello and Happy Thursday!

Today I'm here to share my July patriotism challenge project. 
I decided to steer clear of a flag creation and just go with 
Red, White and Blue
Gift tags always come in handy so I went with red, white and blues 
to come up with this pretty tag.
This would also be great added to a card, don't you think?
You can find this versatile luggage tag along with the feather stencil/mask you see 
on the background in the Linnie Blooms Shop.
ALSO...
While I have you here today I just want to take a quick moment to 
say that today is my last post as DT member for Linnie Blooms.

If you know me at all you know that cards are my comfort zone and I love creating them.
Linnie Blooms helped forced me to step out of my zone and get more involved with mixed medias.  I've had a fabulous time learning and growing in that area of my creative life. 

Here are a few of my favorite creations using Linnie Blooms products. 


I have had a fantastic time working with Linda and her marvelous products.
Thank you so much for allowing me to part of your wonderful design team.
'til next time...


Friday, July 11, 2014

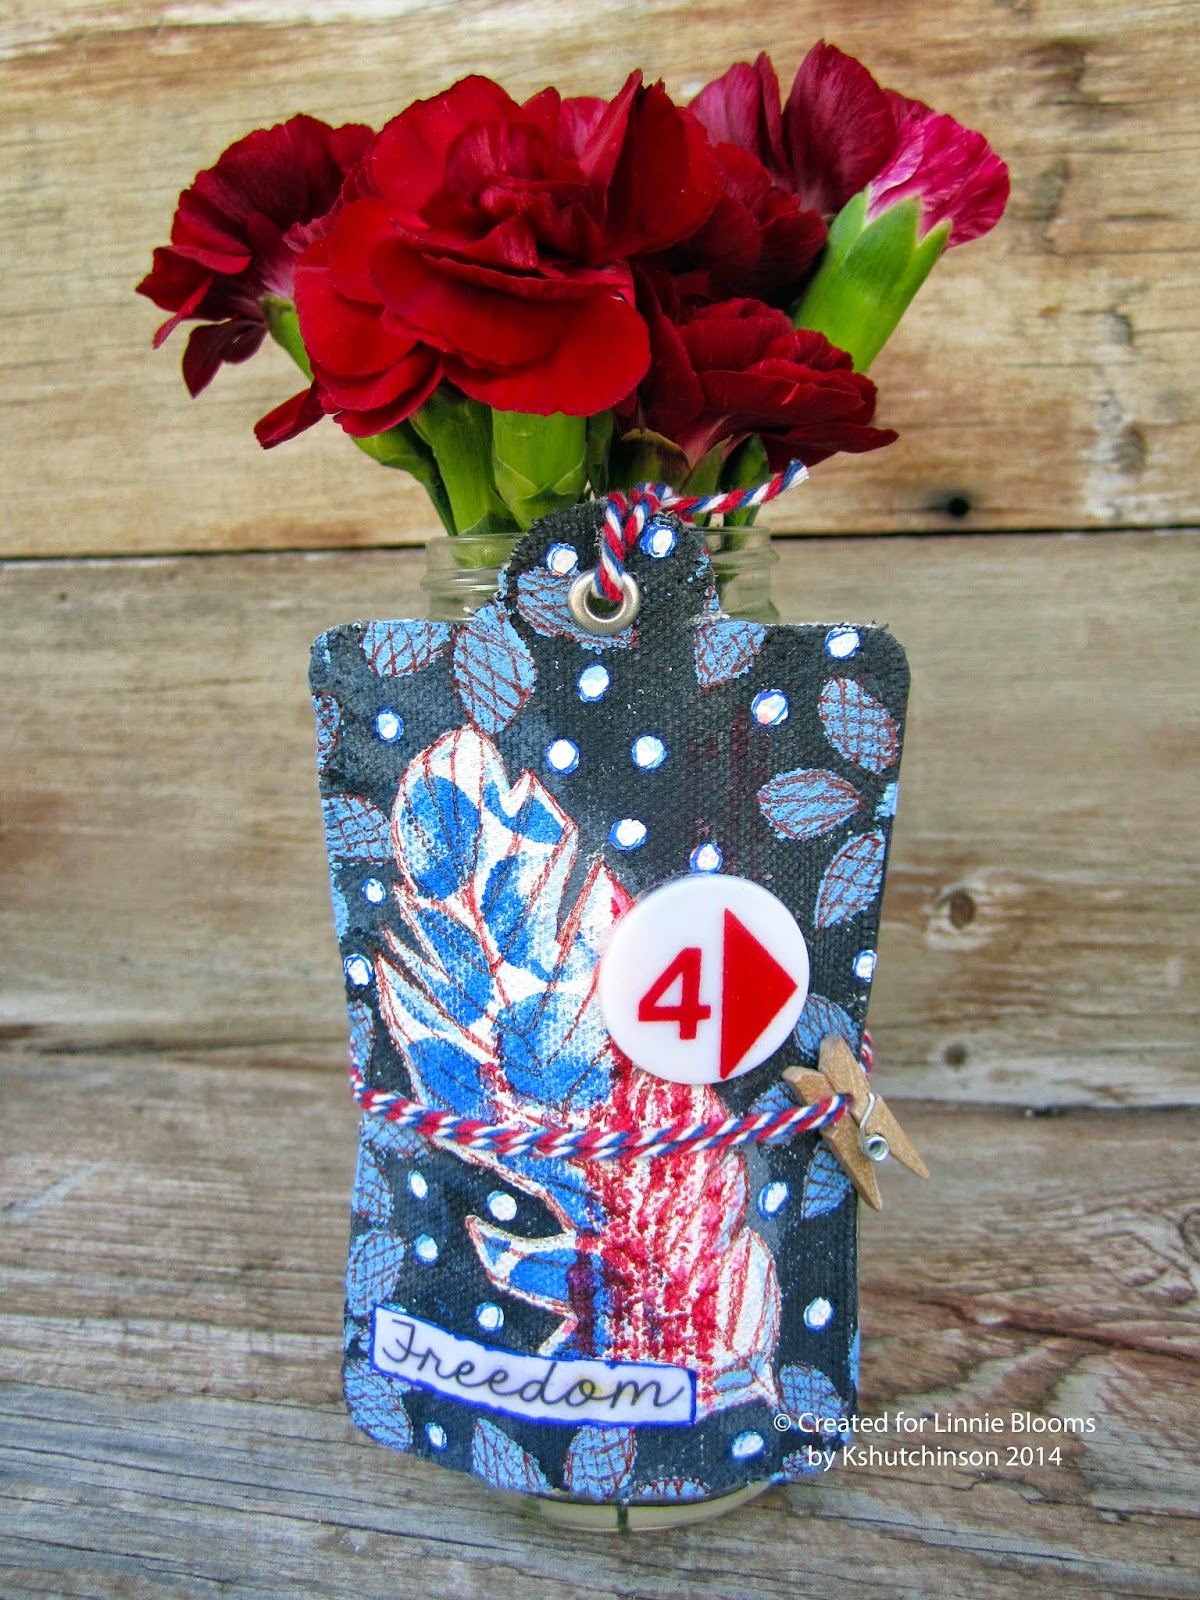
Luggage tag table decoration

Each month the Design Team is given a challenge. This month is patriotism Incorporate your country's colors in your design. My grandfather was a WWII Vet, so the american flag means a lot to me! Using the Luggage Tag, Feather Stencil and Mask, and the Flutter Stencil and Mask.   I made a cute little table decoration for all our Holiday celebrations!


I just wrapped the Luggage tag around an old bottle and put some flowers in it! Just perfect for the dining room table or anywhere else! I think it would be a super sweet hostess gift too! 

Hope you enjoyed my take on the challenge!

See you all soon,
K

Thursday, July 10, 2014

Stenciled T-Shirts

Good Thursday Morning everyone-

Today, I am here to show you something super, fun, easy and cheap to do with your stencils...makes a great gift too. Do, I have your attention now????? Good! Let's get this show on the road then.

Stenciling on t-shirts is what I am talking about......

Supplies-
plain t-shirt (I picked mine up at the local thrift store)
acrylic paint
paint brush
tape
sponges ( I used the cheap triangle cosmetic ones from the dollar store)
Linnie Blooms Feather Stencil and Mask
Sharpies
cereal box or piece of cardboard


1. Place cereal box/card board inside the shirt
2. Splatter paint in three colors to one side (let dry)
3. Tape stencil to the area you want to stencil
4. Using acrylic paints and sponge to color in your stencil (let dry)
5. Use sharpies to color and add details to your stenciled design (you could also just paint the design with more acrylics)
6. Then iron to heat set
7. wear


Super duper fun and easy! Not to mention CUTE!!!!!


If you make any shirts, I would love to see. Actually you could do this on a skirt! How cute would that be? Lots of possibilities! 

Until next my friends....
Hugs,
K