Showing posts with label Canvas Flowers. Show all posts

Wednesday, August 13, 2014

Thinking Of You

Hi Friends! Abby here with ScrappinAbby and I have a super fun & quick tag to share with you today using a couple of the Linnie Blooms Canvas Die pieces .


I used the butterfly canvas die piece to coordinate with the stamp and the smaller black butterflies. I played with some of my Gelatos and added a flower stamen to mimic the antenna and some black flat back pearls for the center of the butterfly. 

I had a partial piece of the flower canvas die left from another project so I tucked it behind my stamped tag. I really like how it turned out. 

This is a great quick and easy project that you can create to brighten someones day. You could leave it on their desk at work, pop it in the mail or attach it to a small gift or bottle of wine. 

Be sure to stop by the Linnie Blooms store and pick up some of these fun and fabulous canvas dies pieces for your crafting projects. 

Thanks for stopping by the Linnie Blooms blog today and for checking out another ScrappinAbby project.

Happy Crafting!!

Friday, August 8, 2014

Stencil and stitch your towels

Hey Gang-

I am here today to show you a fun and quick way to perk up your kitchen towels.

Supplies you will need:
1. Linnie Bloom stencil/mask (I used the Flutter stencil and Mask)
2. Crayons
3. DMC floss
4. Iron
5. Pencil
6. Scrap piece of paper
7. Flour sack towel (I used an Aunt Matha's tea towel)


I can just hear some of you saying that you don't stitch now. So, I got a couple of ideas for you. You could use some of the canvas dies and puffy paints. I attached my canvas die flowers with tear mender (love that stuff). The other idea I have for you is to just stencil ( I used the feather stencil/mask) on them in one color. It gives it a real posh silk screen look to it. 


Hope you enjoyed my towels. I would love to see some that you make. 
See you next time.

Happy Creating, 

Wednesday, July 2, 2014

Vintage 4th of July Tag~July Challenge:Patriotism

Hi Friends! Abby here with ScrappinAbby and I have a super fun project to share with all of you for Linnie Bloom's July challenge~Patriotism. I don't know about all of you but I LOVE the 4th of July. My hubby's birthday is July 3rd so it's a weekend of celebrations in our family. 

For this challenge I created a vintage inspired tag using one of the FAB LB Canvas Flower pieces...
I also have a video that not only shows you the tag up close but I show you how I altered the flower and turned it into a Patriotic flower...

I wanted to mimic the stripes in the American Flag so I used a stencil from TCW and some red glimmer spray on the flower...
 Sorry...I didn't realize the photo was turned until it was too late...but you get the idea right?? : )

After drying the flower with my heat tool, I used one of my Distress Markers in Chipped Sapphire and inked around the edges....


I dried this thoroughly with my heat tool and then spritzed it lightly with some water. I wanted to crinkle the flower so it would have some added dimension and texture, so I once again used my heat tool and my tweezers and dried it in the crumpled shape...

I really like how this turned out...


This was such a fun tag to create and I love how the LB Canvas Flower really stands out and is the star of the tag. I'll be using this for sure amongst my 4th of July decorations for this years celebration. 

Be sure to stop by the Linnie Blooms store and pick up some of the amazing mixed stitch/canvas pieces for yourself. 

Thanks for stopping by the Linnie Blooms Blog today.

Happy Crafting & Happy 4th of July : )

Monday, June 23, 2014

Card for him, card for her!

Hi there crafty friends! This is Jessica, www.jessicalibasci.wordpress.com, come scatter joy with me!
Today I have two cards to show you. The first card I want to share, I made for my wonderful husband who always supports my craft addiction. He is such an encourager.
For both of the cards I designed this week, I used Linnie Blooms canvas shapes. I love these canvas shapes. For my husbands card I used the arrow and for the next card I want to show you I used the canvas flowers.
I used Linnie blooms bloom stencil and mask to create the background flower.
For both the arrow and the flower I colored Linnie's canvas shapes with Gelatos. The Gelatos are one of my favorite ways to color the canvas shapes! The are fun and easy to use. 

My goal today was to provide you with two simple creations that would get your creative juices flowing. One for him, one for her. Have a blessed day, a blessed week and come visit me and let's scatter joy! www. jessicalibasci.wordpress.com

Thursday, May 29, 2014

Canvas Blooms with Gelatos - makes something old look new!

Hello bloomers!! Jessica here from Scatter Joy with Jessann! I love altering items that are just laying around. With the help of Linnie Blooms Canvas Blooms I was able to turn something old into something new!
I had this old burlap covered hand made journal with handmade paper inside. I used the Linnie Blooms flowers from the canvas blooms set to add color and life! This was my first time using Gelatos and they were fun and easy. They also cleaned up quick!


I also used some of the Linnie Blooms Burlap for more texture and color on the front of my journal.
I love Linnie Blooms! I love the product she has. Go now to check it out at http://linnieblooms.com/collections/all
Have a blessed day!

Tuesday, May 27, 2014

Canvas Flower and some fun homemade leaves


Hi Bev Code here today at Linnie Blooms Design.. so glad to be sharing this today.
Starting with the Canvas Floral Shapes I inked and multi sprayed for colour.


Now I hand stitched the centre pulling it together to give it some 
texture looking waves to look more natural.
Then glue them on top of each other.


Now I will share how to make your very own leaves and all you need is green cardstock.
Follow the instructions above to make as many as you need.


I started the card with a boughten base and heidi grace designs paper.
I used my Kreaxions Punches #303 and #903 with insert to make my borders and then
matted them with cardstock to pop the punched borders. 
I also added SRM sticker stitches to the borders.
Now following one of my very own sketches to make this card. (see below) I started
to form the centre - 2 squares with inked edges and a
 SRM floral sticker and then the main centre piece.
Here I used the Linnie Blooms burlap, added more layers to
 my flower from above and added the homemade leaves.
To finish it off I made a multi layers sentiment that started with SRM Sticker.


Thanks for stopping by.. so glad to share 2 ideas ... how to create a fabulous flower from 
the great floral canvas pieces and also how to make your very own leaves.
Be sure to try these yourself... and have fun creating.

Supply List:
Paper: heidi grace design - daydream
Card base and Cardstock: misc
Punches: Kreaxions #303, #903
Stickers: SRM Stickers
Burlap: Linnie Blooms
Canvas Floral: Linnie Blooms
Ink: Tim Holtz Ranger
Other: button

Wednesday, May 21, 2014

May Challenge - April showers bring May flowers...

Happy Wednesday! Today I want to share my creation using the Linnie Blooms Bloom Stencil and Mask. I used the stencil to create a layered flower for the cover of this simple gift journal.


I took four 12x 6 sheets of craft paper folded them in half (to create 6x6)
I stacked them on one another in order to create the writing area of the journal.
I added a 6x6 patterned paper for the cover. Then I attached the flower and leaves I created with the Linnie bloom mask.
I then punched holes at the top below the folds and used black fiber to create a binding.
I added a sentiment, a button, some liquid pearls... Voila!


This is a simple but beautiful gift that I really enjoyed making!
Thanks for taking time to check out my challenge design!

Please join me for more projects at www.jessicalibasci.wordpress.com
Let's Scatter Joy one card at a time!!
Jessica LiBasci

Friday, May 16, 2014

May Challenge~April Showers Have Brought Us May Flowers~Burlap Flower Gift Bag

Hi Friends! Abby here with ScrappinAbby and I have a really fun & easy project to share with all of you that I created for the May Challenge~April Showers Have Brought Us May Flowers. This challenge is all about showing different ways to use the Linnie Blooms Canvas Flowers.

I also have a video to share with you...this shows the products I used along with a short tutorial on how I colored the canvas flower with some Gelatos...


To get the flower shape I was going for, I wet it with some water then used my heat tool to dry it...
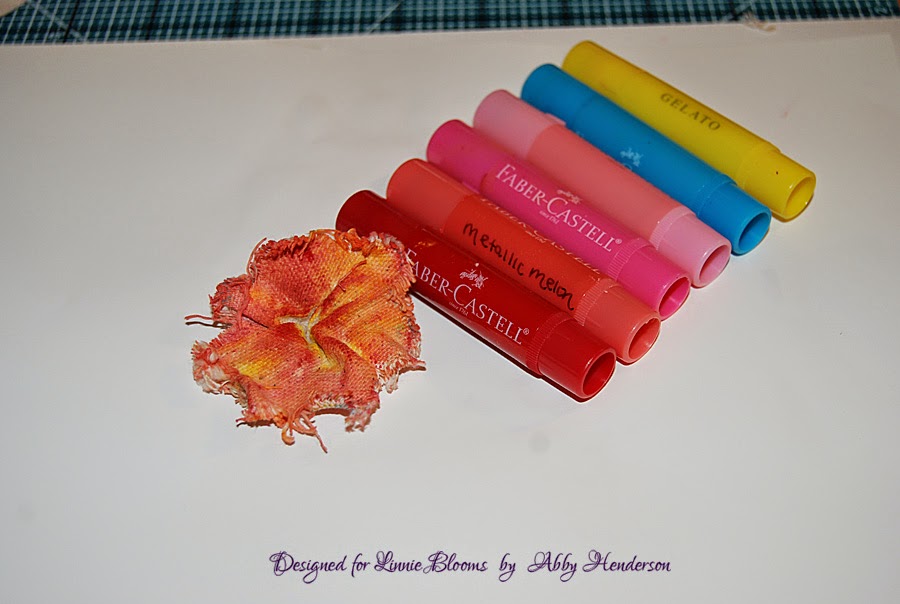
My hubby bought me some Gelatos for Mother's Day so I was excited to use these for this project. I selected the colors I wanted to use and covered the flower in a no particular fashion. I spritzed the flower lightly with some water so I could mix the colors into the flower (sorry I don't have a photo of the actual process...I was the only one home and couldn't take a pic myself..lol but I do have this in the video above : )
I wanted to make the flower appear more real & natural so I added some stamens to the center by making a small cut in the backside of the canvas flower and pushing a few stamens through the center...

To create a unique tassle for my tag, I separated the fibers from the Linnie Blooms burlap and looped them through the top of the tag and used my tiny attacher to hold them in place...


I thought this was a fun challenge and a creative way to use the canvas flowers along with the burlap. I made this for a friend of mine and I'm going to be putting some seed packets in the bag. I think she will love it : )

Thanks for stopping by the Linnie Blooms Blog and for checking out another ScrappinAbby project for the May Challenge. You'll want to stop by my BLOG and see additional photos along with the full list of supplies used for this project. 

Be sure to head over to the Linnie Blooms online STORE so you can pick up some of these FAB canvas pieces for yourself. 

Happy Crafting!!

Friday, May 9, 2014

Creative Storage for Linnie Blooms Canvas Pieces

Hi Friends! Abby here with ScrappinAbby and I am really excited about my first official post as a new member of the Linnie Blooms Design Team!!!

I had so much fun playing with some of the canvas pieces and I came up with a creative & decorative way to not only store my pieces but to organize them as well. 

I recycled some vegetable cans and created these sweet containers that I decorated with some of the very same canvas pieces these will store. I also have a video to share with you that shows you the project up close along with the Linnie Bloom items I used....

 Let me share with you the fun techniques I used on the canvas pieces...
For the flower, I used a script background stamp to create some texture and visual interest. 


Next I used some sprays to give it some color and used my distress tool to fray the edges to give it a shabby chic look...

 I did the same technique for the leaf pieces but used a different background stamp...


 For the butterfly I stamped an actual butterfly image on the canvas piece then used some distress ink to give it some color....


 I wanted to have the illusion that the butterfly had just flown into my craft room and landed on the vine so I taped the wire I had left from when I cut my flowers to the backside of the butterfly so I could bend it as if it was in motion....


 For the bird I used some embossing powder for added texture and shimmer....


 Lastly, I used the same treatment on all the banner pieces that I attached to each altered can....


 Here are a few more photos of the completed altered cans....
 And here's how they look on my shabby chic vintage hutch....

Be sure to check out all of the fabulous Linnie Blooms Products available so you can use them in your crafting projects as well.


Thanks for stopping by the Linnie Blooms blog today. Be sure to visit my BLOG so you can see additional photos of the altered cans along with the full product list of all the supplies I used. 

Happy Crafting and I am SO happy to be a part of the Linnie Blooms Design Team and share some crafty & creative projects with all of you.