Showing posts with label burlap. Show all posts

Wednesday, July 8, 2015

Christmas in July


Some of you may be aghast at the thought of Christmas in July and others of you may be early-bird planner types...I'm just moved to craft when inspiration strikes, so behold, my first Christmas card of 2015. Linnie Blooms canvas evergreen trees with their distressed edges just seemed the perfect fit for my rustic card. I stamped the clear stamp set of stitched doodles on the tree which was quick & easy and I am so pleased with the result.

A Closer Look:
 

Directions:
1. Use a sponge applicator to lightly apply Pine Needles Distress ink to the canvas tree.
2. Carefully separate your chosen doodle from the stamp cluster with sharp scissors.
3. Cover the trunk with a bit of scrap paper. Ink the stamp with evergreen pigment dye ink and carefully press it to the canvas.
4. Continue stamping rows of doodles until the tree is completely covered.
5. Use a sponge applicator to lightly apply Vintage Photo Distress ink to the tree trunk.

TIP: Before beginning, I traced the canvas tree on paper and cut out a tree so that I could use it to practice. One set of doodle stamps are straight and the other is made on a slight curve. I selected the gently curving doodle so the tree would have a more realistic appearance. It was very useful to test different doodle patterns to see how they would appear on the tree. I tried 3 other patterns before I selected the one in the final project. By taking the time and doing a test tree on paper, this preplanning step can help you avoid frustration and disappointment.

Supplies:
canvas evergreen tree (Linnie Blooms), burlap printed fabric (Linnie Blooms), ColorWays Emerald Leatherbound 12" paper (Paper House), Little Man 8x8 paper pad (Paper House), gold rub on transfers (Paper House), Winter Wonderland Die Cut Sticker Embellishments (Paper House),  Stitched Doodles Stamp Set (Linnie Blooms), Pine Needles & Vintage Photo Distress Ink (Ranger), wood veneer tiny stars & snowflakes (Studio Calico), white gel pen (Sakura), christmas ribbon (Celebrate It), red half pearls


Tuesday, July 1, 2014

Red White and Blooming

Hello Linnie Blooms Friends!
Donna K here to share with you my "Red White and Blooming
project in honor of Independence Day.
I love using the long blank canvases to create small home decor items.
I cut the 5"X11" piece in half to created the base for this piece.
Sprayed it with some 
and that is the base for my project. 
You'll also find that wonderful chevron burlap piece in the
I have incorporated a sweet stamped sentiment, some bling, buttons and stickers.
The adorable Melissa Frances hanger I use to display my piece is found HERE.
Thanks for peeking in today...be sure to share your project on the
Linnie Blooms Facebook page for your chance at being the pick of the week!
'til next time.
~Donna K / Created by Donna K

Thursday, May 29, 2014

Canvas Blooms with Gelatos - makes something old look new!

Hello bloomers!! Jessica here from Scatter Joy with Jessann! I love altering items that are just laying around. With the help of Linnie Blooms Canvas Blooms I was able to turn something old into something new!
I had this old burlap covered hand made journal with handmade paper inside. I used the Linnie Blooms flowers from the canvas blooms set to add color and life! This was my first time using Gelatos and they were fun and easy. They also cleaned up quick!


I also used some of the Linnie Blooms Burlap for more texture and color on the front of my journal.
I love Linnie Blooms! I love the product she has. Go now to check it out at http://linnieblooms.com/collections/all
Have a blessed day!

Friday, May 16, 2014

May Challenge~April Showers Have Brought Us May Flowers~Burlap Flower Gift Bag

Hi Friends! Abby here with ScrappinAbby and I have a really fun & easy project to share with all of you that I created for the May Challenge~April Showers Have Brought Us May Flowers. This challenge is all about showing different ways to use the Linnie Blooms Canvas Flowers.

I also have a video to share with you...this shows the products I used along with a short tutorial on how I colored the canvas flower with some Gelatos...


To get the flower shape I was going for, I wet it with some water then used my heat tool to dry it...
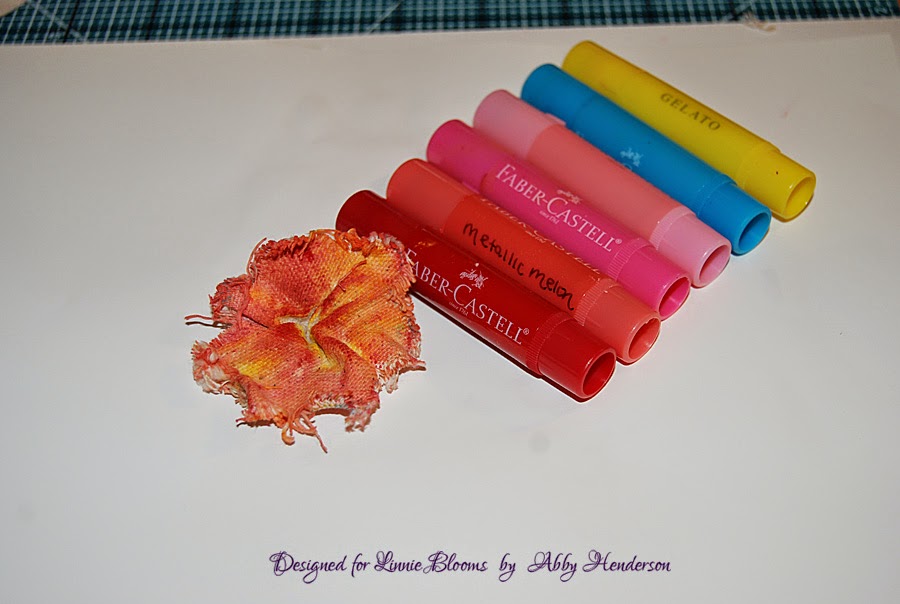
My hubby bought me some Gelatos for Mother's Day so I was excited to use these for this project. I selected the colors I wanted to use and covered the flower in a no particular fashion. I spritzed the flower lightly with some water so I could mix the colors into the flower (sorry I don't have a photo of the actual process...I was the only one home and couldn't take a pic myself..lol but I do have this in the video above : )
I wanted to make the flower appear more real & natural so I added some stamens to the center by making a small cut in the backside of the canvas flower and pushing a few stamens through the center...

To create a unique tassle for my tag, I separated the fibers from the Linnie Blooms burlap and looped them through the top of the tag and used my tiny attacher to hold them in place...


I thought this was a fun challenge and a creative way to use the canvas flowers along with the burlap. I made this for a friend of mine and I'm going to be putting some seed packets in the bag. I think she will love it : )

Thanks for stopping by the Linnie Blooms Blog and for checking out another ScrappinAbby project for the May Challenge. You'll want to stop by my BLOG and see additional photos along with the full list of supplies used for this project. 

Be sure to head over to the Linnie Blooms online STORE so you can pick up some of these FAB canvas pieces for yourself. 

Happy Crafting!!

Monday, May 5, 2014

Creative use of stencils

Hello and Good Monday Morning,

Hope everyone had an amazing weekend. Today, I am here with a fun mixed media project using the flutter stencil and mask, canvas shapes (sunflower), and burlap (teal).


  I started out with a 6 x 6 block of wood. Then I just randomly painting the background in ocean-ish colors with a little touch of yellow ;) I got creative with the flutter stencil of the owl and turned it sideways to make it look like a fish. Painted the fish with cute little faces. Cut and added the canvas sunflowers using glue. Next, I painted them and added a little burlap to the tops of them. I also used a button, washi tape, some words, black colored pencils, and gel pens. Once, I was all done I sealed it.


A couple of close ups for you! What journey will you embrace today? 

Hope your have a creative day!
Kim H