Showing posts with label card making. Show all posts

Wednesday, August 12, 2015

Sympathy Cards

For the most difficult times, a handmade card sends much needed comfort.

Directions:
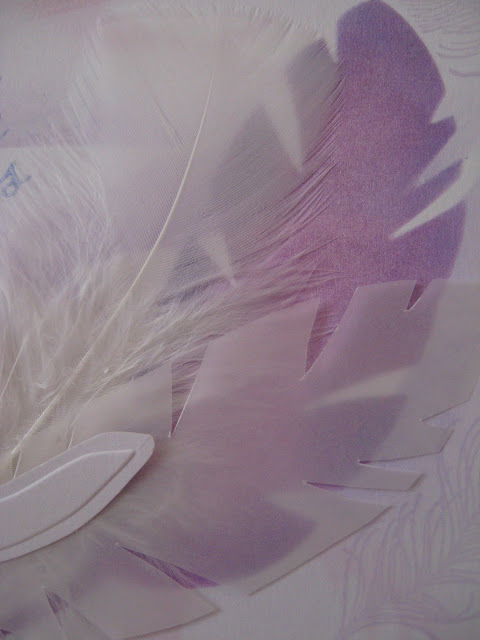
1. Begin to make the background by holding the feather mask firmly in place while gently sponging ink around the edge. Carefully remove the mask, reposition it, and continue sponging. Continue to add more feathers making sure to vary the direction & size of the feather. Also, be sure to place some feathers going off the edge of the paper.

2. Next, make the focal point feather by using the stencil and a darker color ink. Place the stencil down and while holding firmly, sponge the center. To add a bit of shading, use a darker shade of ink around the edge of the stencil and blend it by drawing the sponge towards the center of the feather.

3. Next, add a border strip of embossed feathers. Use a glitter gel pen to add a subtle sparkle to highlight parts of the embossed image. Then add a sentiment of condolence.

4. Finally, stamp a delicate flourish pattern over the canvas feather and add a hint of color by sponging ink along the edge. Lastly, use the stencil to cut a paper feather and embellish the card by forming a cluster using a combination of a real feather, vellum feather, or paper feather.

A Closer Look:


Linnie Blooms Supplies: feather stencil and mask, canvas feather
Other Supplies: pigment ink (Brilliance -Pearlescent Lavender, Purple, Sky Blue, Platinum Planet) (VersaColor - Polar Blue) (Studio G -lilac, rose, acua), condolences sentiment rubber stamp (PSX F-2562), Flourish Background cling stamp (Hero Arts), feather stamp, feather embossing folder (Darice), vellum, sponge applicator, feather, Stardust Glitter Gel Pen (Sakura)
Linnie Blooms
Visit Karen at Art & Soul

Saturday, August 23, 2014

A girlish birthday card in blue

Since one of my doughters best friends turned 5 yo the other day I made this card with a Linnie Blooms Canvas Star as decoration.


Marie

Friday, May 9, 2014

May Challenge - April Showers have brought us May Flowers! - Flowers the alternative way

Are you up for the May Challenge when the Designers have been challenged to use Linnie Bloom Canvas Flowers? I´m going to show you an alternative way of using Linnie Blooms product for creating your flowers. Here is my step-by-step on how to make it happen.


And this is my finished result. I painted the flowers with a bit of Heidi Swapp Color Shine to achieve the right effekt. I also reshaped the flowers a bit to give make them a bit wider. 


I really hope you enjoyed my mini class, and that I will see your creation uploaded to the May challenge!!

Monday, October 21, 2013

Leafy Fun With Pinky **Tutorial**

Good morning Linnie Bloom friends, 
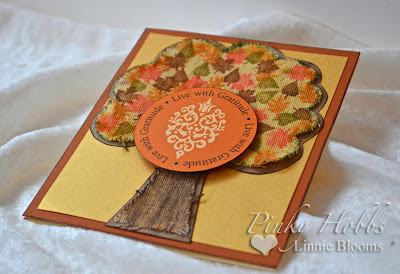
Pinky here today with this Linnie Bloom Canvas card 
perfect for fall or even Thanksgiving. 

These new Linnie Bloom shapes are amazing and easy to work with. 


  • Using small leaf stamps (I used Nuts About You from Avocado Arts) and several fall colored inks (Clearsnap Chalk Inks), stamps leaves all over upper part of Linnie Blooms Canvas Full Tree.


  •  Spritz entire tree using Smooch Spritz in Gold Glow (adds shimmer). 
  • Rub tree trunk with brown ink. 
  • Ink edges of tree by hand. 


  •  Adhere tree (Beacon 3N1 Adhesive) to kraft paper and trim out. 
  • Trim out card (4.5X5) from card stock (CutCardStock) and layer papers. 
  • Adhere tree to front of card as shown. 


  •  Using foam pop dots- adhere die cut sentiment (Teresa Collins) to center of tree).
  • Adhere card front to card base. 

 That's it! A beautiful fall card with a  handmade touch. 

I hope you enjoyed today's post and like this card!
Until next time- Keep on creating.