Showing posts with label rochelle spears. Show all posts

Wednesday, September 16, 2015

"You are My Happy" by Rochelle

Hello Crafters!

It’s Rochelle here today and it’s my turn to share with you my project that I created using Linnie Blooms product! :) 

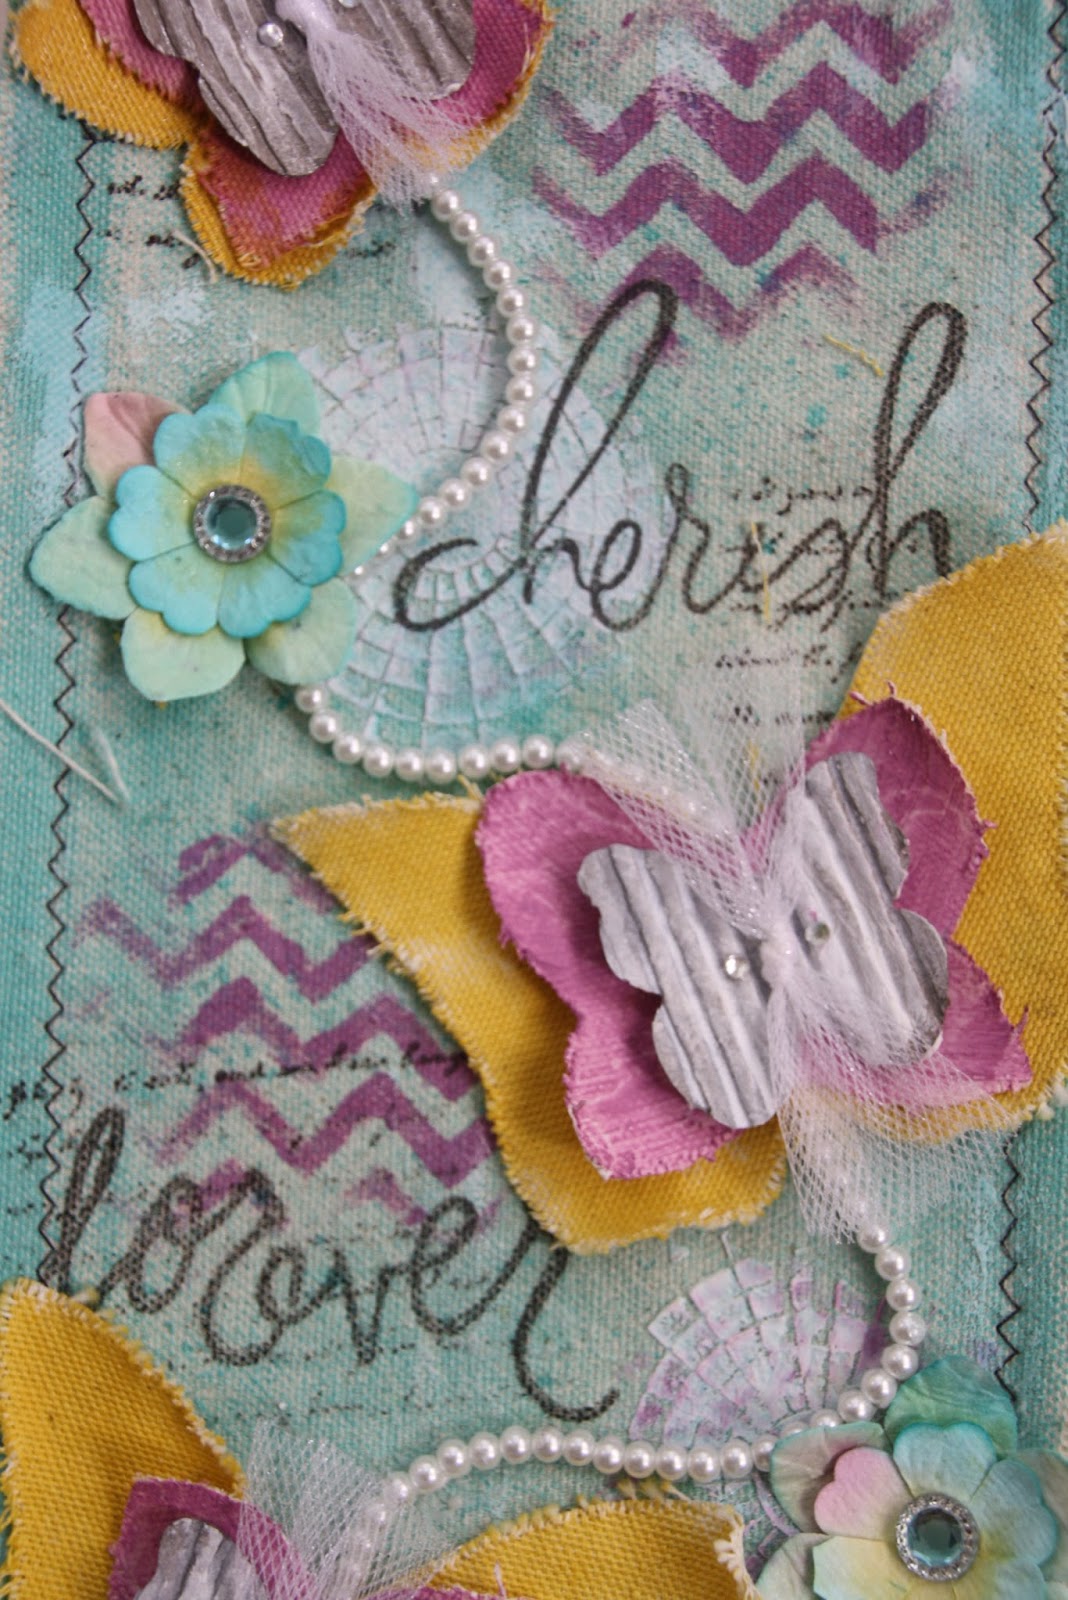
Today I am sharing a burlap panel I altered and decorated with Linnie Blooms Canvas Petal Flowers.

Here it is: 

I started with this 5x7 burlap panel that already had a vintage image on it (sorry, I forgot to take a “before” photo).  I added a layer of Gesso and the color red to cover the image:


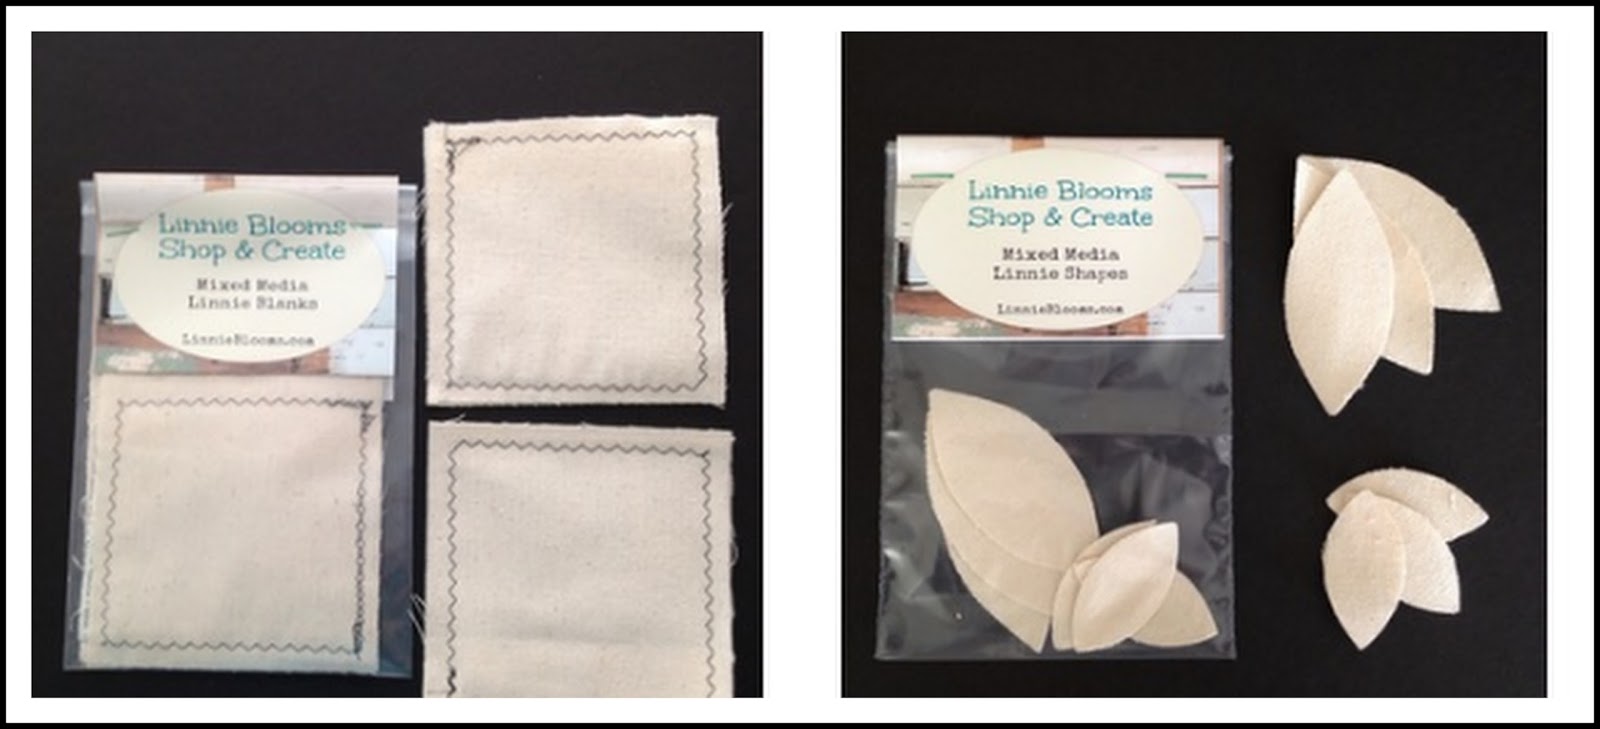
Here’s the Linnie Blooms product I used for the flower: 

I colored each canvas piece (and stamped the circle) and set aside to dry. I cut a small piece of the mesh (my fav!!!) for layering.  While I waited, I cut the vinyl quote from my Cameo and transfered it to the panel. 

 When the flowers dried I layered them and added a button, twine and a couple of stick pins
And there you go!  

A very fun, quick and gorgeous burlap panel with Linnie Blooms Canvas pieces!

Thanks for stopping by!

~ Rochelle

Tuesday, July 14, 2015

Canvas Hoop by Rochelle

Hello Crafters! 

It’s Rochelle again and today I am sharing with you another project I created with Linnie Blooms.

I used the Linnie Blooms Hoop Kit. 

This is definitely out of the box for me... but it was super easy and fun to do and I love how it came out!   The hoop kit comes with a frame and a piece of canvas.  
I started with adding Gesso to the canvas.  

The canvas that comes in the kit is bigger than this.  I had already cut it down to size.  Not on purpose... this was actually my second try! lol 

Once the Gesso dried, I stamped the images on the canvas.  

I used Linnie Blooms Stitched Sunshine Stamp Set  for the sunflower and quote:
And lastly, I used water colors and enjoyed the painting the images.  

After it was dried I added some bling and stickles. 


That’s it. :) 


Friday, June 26, 2015

Rustic Journal Kit by Rochelle

Hello Crafters! 

Today I am sharing with you something a little out of my comfort zone
an altered journal. :) 
This kit comes with a 6X9 Canvax, 2 Petal Flower, 1 Canvas Pocket, 2 Buttons and Jute.  

I started with some Gesso and used a stencil to create some texture.  Once it dried, I added color using a blue Gelato. I folded the journal in half and punched to holes using the big Cropadile. I added a few sheets of paper in the inside of the journal and tied it with Jute. 
Next, I altered the flowers and pocket canvas using a mixture of water colors and Gelatos.  
I used Linnie Blooms Stitched Sunshine Stamp collection on the pocket and doodled around the flowers and pocket.  I also added some patterned paper and instead of the buttons, I used bling for my center of the flowers. Once it all dried I glued everything down in the center of the journal, with the flowers overlapping each other and popping at least one flower up.
And there you have it!  My altered Rustic Journal was done.  I love how the everything came out! :) 
I hope I have inspired you to create your own altered canvas journal! You can find it in the

Thank you for stopping by!

~Rochelle 

Monday, June 8, 2015

Smile & Believe Canvas Layout

Hello!

It’s Rochelle again and today I am sharing with you another 12x12 layout I created using 
This is a layout about my In-laws who just celebrated their 50th wedding anniversary!!  They are truly an inspiration!  I used Websters papers and fussy cut the rainbow and the title piece with the kites.  I also used a few scraps to layer underneath the photo.

I used Linnie Blooms Stitched Greeting Stamp Set for the title & Linnie Bloom Stitched Sunshine Stamp Set  for the sunflower over the rainbow.
For added dimension, I added my favorite... Linnie Bloom Mesh and tied a bow.
I hope I have inspired you to create something fun! Stop by Linnie Blooms for more Canvas products and project kits! :) 

~Rochelle 

Friday, May 1, 2015

I'm Back! :)

Hello!!!  I am so excited to be back on the Linnie Blooms Design Team. :)
Here's a little bit about me.  I have been crafting since 2003.  Although I mostly make scrapbook layouts,  I LOVE to play around with mixed media and textures and incorporating all of it onto my layouts. I was on the very first design team here at Linnie Blooms.  I stayed around a while and then as life happens, I got extremely busy and had to cut back on a few design teams.  But you couldn't keep me away from playing with CANVAS for long! :)  I am back and super excited to hopefully inspire you all with my creativity! 

Today, I would like to share with you a 8x10 canvas board that I created using Linnie Blooms stamps, Canvas Bird, Canvas Leave and Canvas Pennants.  I’m sorry I don’t have step by step photos.  Actually, I was just playing around with this piece and I ended up really liking it and wanted to share it with you all! :) 
To create the background, I started by treating the canvas with Gesso.  Then I used Gelatos with water to create the background color. Next, I took a honeycomb stencil and used a babywipe to remove the gelato color exposing the white Gesso.  I used the same technique with a Bingo stamp creating a white bingo image.  After sprinkling a few drops of Studio Calico mist sprays and letting the piece dry, I added the doily and covered it with a very thin coat of clear Gesso.  To finish up the background I used Linnie Blooms stitch stamps - Stitched Greetings and Stiched Sunshine -- LOVE THEM!!! 

You know what else I LOVE... the canvas bird!!!  I love it so much that you may see it on every project of mine!! lol  I love the versatility of the bird.... color it, stamp it, paint it, doodle on it... whatever you want.  In this case, I used Gelatos and a stamp for his body.  I used a Canvas Leave as the wing.  Isn’t he cute? :) 
  
I pretty much did the same with the pennants. I used Gelatoes and stamps.

Lastly, I layered the papers, bird, rosette ribbon, pennants and bling  pulling it all together by  adding an adorable photo of my Best Friend’s granddaughter! 

There you have it! I hope you like my project and I hope it inspires you to play around with these awesome Canvas Pieces.  You can find more information about these Canvas Pieces on the Linnie Blooms website. 

Happy Crafting! 

~Rochelle 

Friday, January 31, 2014

12x12 Canvas Layout

Hello Crafters!  This is Rochelle Spears and today I would love to share with you a layout I created on a  Linnie Bloom's 12x12 canvas. 
I had so much fun creating this layout!  I played around with some mixed media to create a textured background on the canvas and love how it came out!  I also used different Linnie Bloom's canvas pieces throughout the layout. Here are some close ups:


Items used:
Linnie Blooms ~ 12x12 canvas, mesh, bird canvas, leaves, and triangle canvas.
My Mind's Eye ~ Patterned Paper, brads, and label stickers
Prima ~ flowers
Queen & Co. ~ bling
Doodlebug ~ twine
October Afternoon ~ number stickers
American Crafts ~ Thickers
Mixed Media ~ modeling paint, Tattered Angels mist, & Stazon ink.

Have a wonderful scrappy day!!!

~ Rochelle Spears


Tuesday, December 31, 2013

"2014" Canvas Blank

Hey There!!! It’s Rochelle today and I have just a little something to wish you all a Happy New Year!
This is a 5"x12” canvas blank I altered with Gelatos.  I also used Linnie Blooms Canvas Stars and tried something different. I used Rangers embossing powder to embossed the stars and I really like how the texture came out!  

Here’s a close up on the stars:
And that is it for 2013! I hope you all have a very safe and happy New Year! 


~ Rochelle 

Sunday, December 22, 2013

Playing with Canvas Pieces by Rochelle :)

Hello Crafters! It’s Rochelle today to share with you my projects that I created using Linnie Bloom’s Canvas Pieces.

For my first project I used Linnie Bloom’s Canvas Long Blank, Sunflowers, and Leaves. 
I started by covering the Long Blank with Tattered Angels mist and Dylusions Ink Spray and set aside to dry.  I then started to work on the Sunflowers
 I used Tattered Angels mist first to color the Sunflowers.  Once it dried I stamped a small patterned onto the lighter color Sunflower.  I then layered the Sunflowers with tule and topped it with a canvas sun shape from Studio Calico and a rhinestone from Queen & Co.  I didn’t do much with the leaves other then mixed the greens with Tattered Angels and a Gelato.

I finished my Long Blank by adding half of a doily, some tule, a paper doll I made with the Prima Paper Doll stamp, a tag that I stamped with a quote and stitching and added my title with Thickers.

My second project I wanted to share with you today is Canvas Flourish Pocket and a Canvas Owl from Linnie Blooms.  
I wasn’t sure what I wanted to do with this pocket, but I definitely knew I was going to give it away as a present.  It’s perfect for adding a gift card or money into the pocket along with a tag.  

For the pocket, I started with coloring the pocket with a blue Gelato, then stamped it with hearts.  
For the the Canvas Owl, I stamped it and lightly inked the edges.  Then I added cardstock for the wings and Queen & Co. Rhinestones for the eyes. 
I always have so much fun creating with Linnie Blooms Canvas pieces! I hope these projects have inspired you to give it a try!  You can check out Linnie Blooms store HERE.

Thank you for stopping by Linnie Blooms Blog today! :) 


~ Rochelle 

Tuesday, October 29, 2013

Make a Wish Layout with Canvas Shapes

Hello!! Rochelle here to share with you a layout I created using Linnie Blooms canvas shapes. 


For this layout I used canvas stars and a canvas tag.  I used two different types of mist; Maya mist and Tattered Angels mist.  For the stars, I outlined them with Rangers Stickles and Liquid Pearls. I love how the canvas shapes add texture and dimension to layouts! 

  You can find these shapes and more HERE.

Happy Scrappin'!

~ Rochelle 


Tuesday, October 15, 2013

Fall Card by Rochelle Spears

Hello Crafters! It's Rochelle today sharing with you a Fall card I made with the Linnie Blooms Canvas Leaves.  I really wanted to use the cute canvas Owl from Linnie Blooms but the postal carrier still has it! lol However, I LOVE the canvas leaves and can't get enough of them so I wanted to showcase them on this card.

I didn't do anything fancy other than mix the different mist/inks to create the colors.  I started with a cat-eye ink pad (brown) and inked the edges. Then I used Maya mist (Lemon) with added that color to the leaves with a brush. Lastly, I took Tattered Angels mist (Tiger Lily)on the outer parts of the leaves. I used water to blend the mists together.

Make sure you check out Linnie Blooms store for awesome new Canvas Shapes! 

~ Rochelle S. 


Saturday, September 7, 2013

Thank You Card by Rochelle Spears


I am so in love with the Linnie Blooms Canvas Bird Shapes! I thought I would add one to a Thank you card I created and it looks wonderful! Take a look:

For this bird, I used acrylic paint first.  Then I added Tattered Angels Glaze for a shimmer look.  I then stamped the bird with Versafine Ink.  Then I used a Linnie Blooms leaf shape for the wing.  I added the acrylic paint, topped it with a bit of white to lighten it up and then the glaze for shimmer.  That’s it! 

Here’s a close up on the bird.

To purchase and see more Linnie Bloom shapes, please visit the Linnie Blooms Store.

Happy Crafting! 

Rochelle Spears

Friday, August 30, 2013

Canvas Blank By Rochelle S.


Hello!!!  Today I'll be sharing with you another fun project with  Linnie Blooms Canvas Shapes!!!

For this project, I used Linnie Blooms Canvas Blanks and Leaves:


I love how the chevrons on the Canvas Blank came out!  I used Mr. Huey's spray with Heidi Swapp stencil.  The color on the canvas with the stitching works so well together.

I used 3 of the Linnie Blooms Canvas large Leaves to create the flower.  I used Tattered Angels Glam and Glaze to color the leaves. Here's a close up:


What I love about Linnie Blooms Canvas Blanks is that you can create right on the canvas blank and then add the blank to a variety of projects.  I can add this blank to an album cover, to a larger canvas board,  put it in a shadow box, add it to a scrapbook page, a card or just leave it as is. :)

You can find these blanks and more canvas pieces at Linnie Blooms

Thank you for stopping by!

~Rochelle Spears 

Monday, August 19, 2013

Cherish Forever Long Blank Canvas Project

Hello Crafters! Rochelle here today to share with you a mixed media project I made with Linnie Blooms Long Blanks and Butterfly Shapes.
I had a lot of fun playing with different types of product with this project.  I started by spraying Linnie Blooms long blank with Tattered Angels Mist. Then randomly stenciled the chevrons using Art Anthology paint, and stenciled the circles with modeling paste, and lastly random stamping with a script stamp with a PITT pen by Faber-Castell.

For the Linnie Bloom butterflies shapes, I used Tattered Angels for the yellow and Art Anthology paint for the pink.   The corrugated butterfly is by Jillibean.  I misted it first with Dylusions but wanted it more darker so I used a light coat of modeling paste.


I used white flowers from Petaloo.  To paint these flowers, I used a mixture of mediums I used throughout the project.  However, I used a paint brush to apply the mists/paint onto the flowers and then added water for a more watercolor look.

Lastly, I used some old Heidi Swap clear word stamps (that I just LOVE) with archival ink.


I am truly having a great time being part of Linnie Blooms design team and loving all her canvas shapes!! You can see more of her shapes HERE.

Thanks for stopping by! :)

Rochelle Spears