Sunday, September 29, 2013

Linnie Blooms - Sassy Time

I have the pleasure of bringing to you another project I created for Linnie Blooms.


For this project, I used:
Linnie Blooms Canvas Long Blank


I love working with the  Linnie Blooms Canvas Long Blank.  They are the perfect size!

  To create the above:
1.  Applied light gesso wash
2.  Blended three colors of Tim Holtz Distress Ink (Faded Jeans,  Peacock Feathers, Gathered Twigs) to create the background.
3.  Stamped the GinaK images using Jet Black Archival Ink
4.  Hand-lettered "Life is like a camera...),

 Working with the canvas the ideas are endless.  Check out the Linnie Blooms store.to see all the canvas pieces that only are limited by your imagination.

Thanks for looking.

Saturday, September 28, 2013

Life Is...

Hey everyone. Shanna here with a new project that I made for Linnie Blooms. 
I love how this turned out and I am so excited to share it with you.

Check out the video if you would love to know how I made this canvas.


Items Used:
Linnie Blooms: Medium ButterliesButterflies, and Pennants
Dylusion Sprays
Lindy Stamp Gang Spray
Gina's Design Nancy Flourish Shapes
Washi Tape
Prima Stencils, Paper, Stamps, and Chalk
Faber Castell Gel Sticks
Modeling Paste
Creative Inspiration Paints
Tim Holtz Alphas 
Gesso


Shanna Shands

Friday, September 27, 2013

Art Journal Cover

Happy Friday, crafty people!  Marfa (that's me ;-)) is back to show you another fun Mixed Media project using Linnie Bloom's canvas shapes.   This was sooooo much fun to do!  It is the reason why I consider myself a Mixed Media artist.  It encompasses every single craft that I can think of right now.  This project is a Design Team project forLinnie Blooms.  I used several canvas shapes that you can find at the Linnie Blooms store.  I used a birda heartpockets and pennants .  Canvas is so cool to decorate because you can do almost anything to it and it will take it!  I inked, I embroidered and I glued to my heart's content. This cover is so yummuylicious.  I can't wait to make more.   Scroll down to see a short video that's going to show you some cool details.

Here's the video:


Marfa Otano
               aka Crafting Marfa
Designer for Gina's Designs, video designer for Linnie Blooms

Wednesday, September 25, 2013

Embrace Autumn Wall Hanging

Hello everyone and happy hump day! Today I have a super fun project for Fall.
 I started with a canvas blank. They are awesome and you can't beat it being already sewn and cute and ready to go! :) I used a chevron stencil and craft paint to make the background.

 The star comes in a pack of 4! Nice for lots of projects.
 These trees are one of my favorite canvas pieces I've worked with so far. So very versatile. Love that you could use them for any season. I just used a stencil brush and craft paint to get the effect I wanted.
The little owl is so cute just plain canvas so I knew he would be fun to play with. I actually painted it and used sharpies on it and didn't care for the way it turned out so I gesso'd it and started over. The canvas took the abuse beautifully. I added the saying and that's that. I love it. I've already had a friend try to steal it. LOL
Hope you all enjoy your day! Thanks for stopping by! 


Hydrangea ~ Linnie Bloom Design Idea

 I have been thinking about this piece for quite some time and it finally came together today. It is my latest design for Linnie Blooms using their canvas shape ~ small butterfly.

I started with one of my favorite color pallet purples and greens. After I covered my 8″ X 10″ canvas with sewing pattern tissue that I had drizzled with ink, I gave it a quick sketch of my flower and a light thin coat of white gesso. Before it dried, I wiped away some of the gesso so that the layer beneath would still show through.

I painted in the leaves, starting with a dark, transparent forest green and layered on a turquoise, moss green and bright yellow green to shape and form them a bit. The flower was dark purple and some of the white gesso mixed in here and there. I tried to keep it loose and free. A little of the darkest purple for line details around the leaves and blossom completed most of the painting portion of this piece.
background and leaves

To create the flower petals, I took the small butterfly canvas shapes and colored them with Gellato Paint Sticks in blues, greens, purple and pink. A light brushing with water softened the look of the petals and blended the colors together. After drying overnight, I scrunched them together and stitched the center points together as well as the folds that formed. I used a total of 13 small butterfly canvas shapes for this piece.

I arranged the petals in a pleasing arrangement on my work bench, then used hot glue to attach them to the canvas. After I removed any loose canvas and hot glue threads, I signed my piece. I think it turned out pretty well and would like to try a few more of these.
I saw some white hydrangeas yesterday that are turning brown with age. They were the prettiest shades of white, cream, touched with pink and a bit of brown. This sure would make a pretty pallet. I also would like to try more blues and purples as well as mostly pinks.
Hydrangea detail 1

Hydrangea detail 2
Hydrangea detail 3

I hope you enjoy my project! If you like this piece why not try one for yourself?
Visit my friend Linda Barutha’s online shop, Linnie Blooms and order some of these wonderful and easy to use canvas shapes.
Thanks for stopping by. Be sure to come back and visit again!
Linda Kay

Tuesday, September 24, 2013

Thank Y-O-U

Hello Fellow Creatives,

Here’s a new project using Linnie Blooms fabric shapes. A mixed media thank-you note.
A handwritten/homemade thank-you note speaks volumes and sends the message that
you care enough to invest yourself personally in acknowledging another.

So, send a little joy someone’s way…

Step One: Start with a store bought BLANK greeting card. Glue a used painted
papertowel to the front with Mod Podge. Use a brayer to make it extra
smooth. Trim Excess.

Step Two: I found some leftover alphabet stickers to spell the work Thank. I chose
these letters because they matched the paper towel so well.

Step Three: Paint three Linnie Blooms canvas fabric squares with watercolors crayons
using the same color palette.

Step Four: Stamp the letters Y-O-U using rubber stamp letters and brown ink.

Step Five: Sew around each square shape twice using a sewing machine and dark
brown thread. Glue in place.

Step Six: Write your thank you inside, address, add postage, mail, and make
someone’s day a little brighter.

Happy Creating!
XO, Cheryl

Monday, September 23, 2013

Bootiful Banner Decor

Hi there....Laura here with my second guest designer post here at
Linnie Blooms.  This time I've used the Linnie Blooms canvas blanks.
These have so many options.....here is my Halloween decor project:

I used three together to make this spooktacular "BOO" banner!
I used Dylusions Spray Ink to color the blanks, then went back
and stamped them in black ink with a script stamp.  I frayed the
edges a bit, and then brushed them with black paint using an
Adirondack paint dauber.  Eyelets and twine connect the pieces
of the banner.  Glittered chipboard letters and a little bling finish it
off with a spooky sentiment.

Here's a closer look:
 

Thanks for stopping by today, and you can find these fun canvas
pieces (and SO much more) in the Linnie Blooms store HERE, so
you can make your own spooky home decor!

Sunday, September 22, 2013

Tim Holtz Fabric Fun

A little clutch made with Tim Holtz fabric and Linnie Blooms butterflies.  Here's a picture of the backside:


So much fun!


If you like the new Tim Holtz fabric, you might want to check out the limited supply of Linnie Blanks that I just added to the shop:)  


Saturday, September 21, 2013

Canvas with Linnie Blooms Shapes

Hi everyone!
- Sandra here - Today, playing with Linnie Blooms Shapes, I realized a little canvas, 20 x 20 cm:


there are many different layer in the background, made with my favourite products: Dylusions, gesso, stencils, acrilic colors and Distress Ink:


I used the small canvas butterfly, and I add in the middle a Key and many small buttons


Hope you enjoy

Thanks 

Friday, September 20, 2013


Hello all! I'm back again with this super fun mixed media canvas.. I was feeling a little blue, and needed some bright colors and tried some fun new techniques.. I used paint, ink, stamps, texture paste, and of course Linnie Blooms Mixed Media Heart Shape!! I love how I turned the heart into a balloon so my cares and worries could float away ;) .. I used acrylic paint to color the balloon and embellished  with a rosette trim and twine..  A quote, some doodeling, and a few highlights finished it off.. I love how the Linnie Blooms Shapes can easily be altered and colored to fit any style and project :)


You can find all these wonderful canvas pieces at the links below.. Also be sure to check out Linnie Blooms on facebook for all the latest projects and new items!!

Linnie Blooms - by Linda Barutha

Thursday, September 19, 2013

~Lovin my Linnie Blooms~

I finally had some free time to play with more of my Linnie Blooms Mixed Media Canvas shapes!
My new favorite shapes are the pennants or some call them banners.  I also love the little houses or arrows.  I have seen these used as both, which is awesome since you already get an option before you even get started to play. 
$2.99 pack of 5
$2.99 pack of 3

Here are just a few of my latest projects.  The long blank I actually made while visiting the Linnie Blooms Shop.  I made it during a class with the owner Linda Barutha.  The book was just a cover I did for fun.. I used a heart and a mini blank on that cover.   The mini canvas piece was fun to make.  I knew I wanted a picture of my youngest daughter and a few of these bits and pieces of things I loved.  I used 4 Linnie Blooms shapes on the canvas wall hanging, 2 on the book, and 7 on the long blank.  You can add the mixed media canvas shapes to scrapbook layouts and cards too.  What would you do with a few of these shapes?
Close up of a House

Long Blank & 7 other Linnie Blooms Shapes

Latest 3 Projects using Linnie Blooms Mixed Media Shapes

Notice the 3 Pennants?

Wall Décor for my daughter

Gelato colors I used for my Pennants & House
 
A mini blank & a heart were used on this book.


Now that I have shared 3 of my latest Linnie Blooms projects with you, can you share our blog with your friends?  We want to spread the word about these wonderful Mixed Media Shapes.  Being a new company is an adventure and so much fun.  But like any company we need our fans, friends, and crafty people like you to share the love for mixed media products.  We will be introducing our new release designs this weekend.. who knows we may have a giveaway so check back!

Linnie Blooms Design Team Coordinator & Fan, Kimberly (Scrap It Girl) 

Ready to fly!

Soaring is not on my "to do" list lately. More like "squeeze in some crafty time when I can". However, this ink-speckled bird is ready to fly! When I was shopping at Linnie Blooms in July, my items were given to me in a plain Kraft gift bag. I told Linda Barutha (Linnie Blooms owner) that the bag would come back to her eventually. I kept my promise and went wild! I zentangled with a fine point Sharpie on a square blank and then added Distress Inks to this bird and its wing (which also doubles as a leaf shape). Sharpies, Distress Inks...is there anything these Linnie Blooms shapes can't withstand?

And why stop there? I crinkle folded some border punch cut strips and attached them onto the bottom of the bag. I also spy a paper doily, a butterfly and flower (both punched from an old book), a little spritzing, and don't forget the burlap scrap!

How about you? Ready to soar or just squeezing in some crafty time when you can? Hope it's the first one!

~Kelly


Pin It

Wednesday, September 18, 2013

Sweet Bird

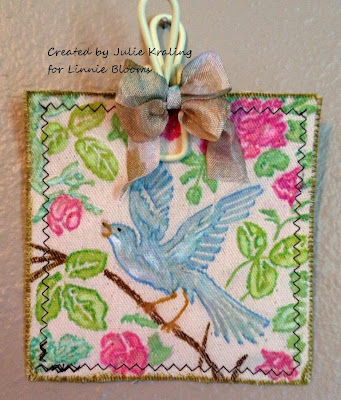
Julie from A Little Bit of Bling here-- I'm so excited to be sharing this project that I created for Linnie Blooms!
This is one of my favorite things that I've ever created.

It all started with a canvas blank.

I was holding it, and feeling the texture (there's a surprise sewn in between two pieces of canvas)- I decided to emboss it with my Cuttlebug and an awesome Anna Griffin folder that I have.
I wasn't sure if it would work-
but it did!!

Once I had the embossed image, I used Creative Inspirations Paint on it.  This paint works fantastic on canvas!  I did some outlining with Copic Markers- which also works great on canvas.
The end result:


I finished it off with a clip and some 3 Girl JAM ribbon from the New and Improved Seasons Bundle.

Make sure to check out the Linnie Blooms store for more inspiration and fabulous products!

Tuesday, September 17, 2013

Thinking of You

Hi there friends!  It's Kisha here again sharing another crafty project.  Today, I've created a thinking of you card using Linnie Blooms canvas butterfly.  For this project, I chose to work a little different with my canvas piece.  I actually chose to not create using multi-mediums and distressing.  Though, I kept it fairly simple, I hope you like the the technique I used to ad a bit of shabby to the butterfly.


You can follow this link to take a peek of my YouTube video - http://youtu.be/zhlBZKCRwjI or click below


This was such a quick card to complete, which is great when you suddenly need a simple yet meaningful sentiment.


The canvas butterfly I used on my card can be found here.  Also, there are so many great items and NEW items in the shop.  Take a hop over to see what's new in the shop and get crafty with us!

Have a super great week!

Kisha