Showing posts with label gelatos. Show all posts

Monday, July 14, 2014

Back to school teacher treat!

Hello everyone! Jessica LiBasci here from Scatter Joy with Jessann! Hope everyone is enjoying their summer. As we journey through summer, we journey toward the start of a new school year. It is important to start the year off right! Teachers often have special ways of welcoming our children, it is time for us make them feel appreciated too! This design is intended to inspire you and your child in creating something special for their new teacher. Linnie Blooms has a ton of wonderful supplies for you to create your teacher treat!

For this one you only need a few supplies!
Linnie Blooms Nature Canvas Dies (tree)
Chocolate gelato
Green Tea gelato
Linnie blooms shabby trim (I used ribbon from my staff but I love the shabby trim much more!)
Any style green paper, blue paper and tan paper
Small red buttons
Black sharpie
Card board
Hole punch
Adhesive

I began my project by cutting, what would soon be the green top of of the tree away from the trunk.


Once cut, I used the green tea gelato to color the top of my tree and the chocolate gelato for the trunk.

While the canvas was drying I cut and adhered my paper to the cardboard. I used a blue patterned paper for the sky and a green patterned paper for the grass. Once the canvas was dry I glued it on. Then I glued on my buttons and tied on my ribbon!

To finish my project I used a black sharpie to create a dashed line/stitching effect. 
You can create any banner and wording you choose.


Monday, July 7, 2014

Birthday Banner

Hello Linnie Bloom Lovers! Jessica LiBasci here from Scatter Joy With Jessann!  Today I want to share a gift I created for a special friend, a Birthday Banner.
I used the Linnie Blooms Canvas Pennants and created a message to remind my friend how much she is LOVED.  

Supplies that I used that can be purchased at www.linnieblooms.com
Canvas Pennants, Gelatos, Color Shine Spritz and the Bloom Stencils.


Here is what I did...


Once the pennants were colored I used a wet brush to spread the colors over the canvas. 

Then the pennants had to dry. 

I used clear acrylic stamps and archival ink to stamp on letters to each pennant.

Next I used Heidi Swapp Color Shine Spritz to spray over each pennant. The bronzer is my favorite because it leaves such a beautiful metallic finish. 


My cropadile allowed me to make a perfect hole in each pennant so I could attach them creating the banner.

Later I added liquid pearls as accents to each pennant.

I tied my banner up using wooden skewers. I placed my skewers along with the paper flowers I made into altered jars. I decorated the jars using craft paper and pattern paper using the Linnie Blooms Bloom Stencil

I hope you enjoyed my Birthday Banner! For instructions on how I made my flowers visit my blog, www.jessicalibasci.wordpress.com.
Have a blessed week!
Smile Jesus loves you! 

Monday, June 23, 2014

Card for him, card for her!

Hi there crafty friends! This is Jessica, www.jessicalibasci.wordpress.com, come scatter joy with me!
Today I have two cards to show you. The first card I want to share, I made for my wonderful husband who always supports my craft addiction. He is such an encourager.
For both of the cards I designed this week, I used Linnie Blooms canvas shapes. I love these canvas shapes. For my husbands card I used the arrow and for the next card I want to show you I used the canvas flowers.
I used Linnie blooms bloom stencil and mask to create the background flower.
For both the arrow and the flower I colored Linnie's canvas shapes with Gelatos. The Gelatos are one of my favorite ways to color the canvas shapes! The are fun and easy to use. 

My goal today was to provide you with two simple creations that would get your creative juices flowing. One for him, one for her. Have a blessed day, a blessed week and come visit me and let's scatter joy! www. jessicalibasci.wordpress.com

Thursday, May 29, 2014

Canvas Blooms with Gelatos - makes something old look new!

Hello bloomers!! Jessica here from Scatter Joy with Jessann! I love altering items that are just laying around. With the help of Linnie Blooms Canvas Blooms I was able to turn something old into something new!
I had this old burlap covered hand made journal with handmade paper inside. I used the Linnie Blooms flowers from the canvas blooms set to add color and life! This was my first time using Gelatos and they were fun and easy. They also cleaned up quick!


I also used some of the Linnie Blooms Burlap for more texture and color on the front of my journal.
I love Linnie Blooms! I love the product she has. Go now to check it out at http://linnieblooms.com/collections/all
Have a blessed day!

Wednesday, May 28, 2014

Linnie Blooms a wand and a tiara

Hello there! 
I hope you're all having a fabulous week so far?!
Today I'm here to share a fun canvas…a girly girl kinda thing!
I used lots of PINK, a
piece (cut in half)
and a Linnie Blooms canvas shape star.

I added stamping, glitter, molding paste to create more layers and texture.
I think the over all project is really FUN and kinda cutesy!
I hope you like it too. 
I will list my Linnie Blooms supplies below.


Stop by my blog for more information.
Have a Bloom{ing} good day!


Friday, May 16, 2014

May Challenge~April Showers Have Brought Us May Flowers~Burlap Flower Gift Bag

Hi Friends! Abby here with ScrappinAbby and I have a really fun & easy project to share with all of you that I created for the May Challenge~April Showers Have Brought Us May Flowers. This challenge is all about showing different ways to use the Linnie Blooms Canvas Flowers.

I also have a video to share with you...this shows the products I used along with a short tutorial on how I colored the canvas flower with some Gelatos...


To get the flower shape I was going for, I wet it with some water then used my heat tool to dry it...
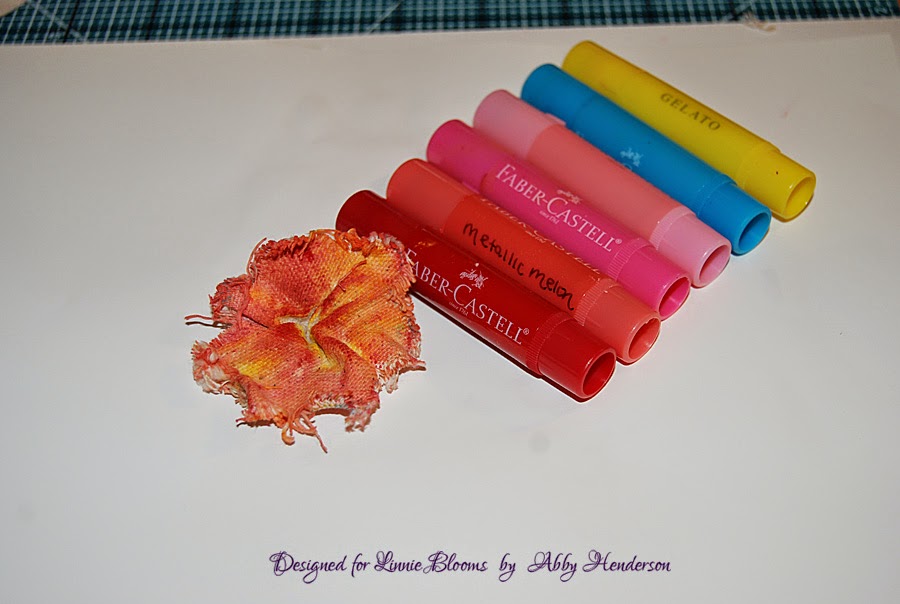
My hubby bought me some Gelatos for Mother's Day so I was excited to use these for this project. I selected the colors I wanted to use and covered the flower in a no particular fashion. I spritzed the flower lightly with some water so I could mix the colors into the flower (sorry I don't have a photo of the actual process...I was the only one home and couldn't take a pic myself..lol but I do have this in the video above : )
I wanted to make the flower appear more real & natural so I added some stamens to the center by making a small cut in the backside of the canvas flower and pushing a few stamens through the center...

To create a unique tassle for my tag, I separated the fibers from the Linnie Blooms burlap and looped them through the top of the tag and used my tiny attacher to hold them in place...


I thought this was a fun challenge and a creative way to use the canvas flowers along with the burlap. I made this for a friend of mine and I'm going to be putting some seed packets in the bag. I think she will love it : )

Thanks for stopping by the Linnie Blooms Blog and for checking out another ScrappinAbby project for the May Challenge. You'll want to stop by my BLOG and see additional photos along with the full list of supplies used for this project. 

Be sure to head over to the Linnie Blooms online STORE so you can pick up some of these FAB canvas pieces for yourself. 

Happy Crafting!!

Sunday, May 11, 2014

I love you Mom

Hello to all!
First I would like to wish a Happy Mother's Day to all the moms of the world. Today is your day Mom and for you all honor and all glory.
I'm super happy to be here as dt and show my project of the day. I used products you can get directly from Linnie Blooms online shop!

For this canvas used gelatos, stamps, stencil with texture Snow..


I hope it can inspire you. thank you. Have a great day!

Thursday, April 24, 2014

Asia Journal ~ A Linnie Blooms Mini Journal


Asia Journal ~ A Linnie Blooms Mini Journal

I have been designing for Linnie Blooms for quite a while now. A very good experience and a great chance to get my hands on their product line. When I put my hands around one of their Mini Journals, a small 5" X 7" collection of canvas pages and a wonderful Flourish Pocket tucked inside, I fell in love!

Linnie Blooms Mini Journal
It has 4 pages of stitched surfaces sandwiched with papers recycled from old book and a wonderful pocket opportunity to insert little bits of unexpected joy inside. I just knew I had to create something special with it and something dear to my heart. It called for lots of details and a place for fond memories.

Since I lived in Southeast Asia quite a while, what better subject than memories and ephemera from my trips and life there? My own little memory scrap book to hold some favorite treasures.

Asia Journal by Linda Kinnaman, front cover
I was interested in trying out some Transfer Artist Paper, which I had heard does a great job of transferring images to fabric. I wanted to give it a try on canvas and see what I could do with it. I found an image from one of my Dover Publicationsbooks that I thought would set the color and theme well. I had a bit of trouble getting the image to adhere well, but think it came out a bit vintage looking, which after a while grew on me. It makes it look old and well worn, like a favorite book which has been tucked in my backpack while on my journeys.

A special note: Thank you to Leslie Riley, who took time to consult with me over the effects I was trying to achieve and learning to love what became.

I added some simple Linnie Blooms shapes for the title and some rub-ons and old stamps for accents. A few jade beads and some brass charms added a bit of bling to the front cover.

Buddha pages

While in Asia, visits to Buddhist temples are a must for learning about the culture and customs of the people. I have been to many and find each one beautiful, colorful and wonderful places to see. I have met some very interesting people while visiting temples, and have gained a respect and embracing of their principles. I wanted to honor my visits with a couple of images from travel brochures that I had collected.

Ladies in waiting pages
The beauty of Asian women is well known! I wanted to capture a vintage collection of Chinese and Japanese costumes and accessories. Their attention to detail, grace and elegance are impressive to me. Pink and green combined together spoke of this for me and I saw a lot of it while traveling. Strong yet feminine colors of spring time. Beauty and charm.

Most women now embrace the Western style of clothing, so spotting a women in traditional dress was a delightful surprise. Often they would pose for a quick photo if you politely asked, often with a blush and a small giggle covered with a delicate hand. It is nice to see these traditions still upheld and celebrated during special times or events.
Ladies in waiting pages
postcard insert for pocket

Tucked inside that Flourish Pocket I found an old post card of a Reclining Buddha in Thailand. I embellished it with more old stamps and an old print of a garden scene and some flourish rubber stamping.

Flower pages
Asia is also known for their lovely flowers. So many of the flowers we use today in our own gardens are from all over Asia. I myself, have peonies similar to the one pictured here. These two pages are more Transfer Artist Pages that I colored and painted in with myGelato color sticks.  I also added some old stamps again and a book mark that I picked up in a Hong Kong shop.

Memories of China, back cover
Finally, the back cover depicts a few placed in Hong Kong that I have visited. I love all the details they put into their architecture. Tons of carved and painted details all over the place! Huge statues, large structures for placing incense to burn, old paintings and tapestries. Wonderful flare for color and ceremony.

I am pleased with the results of my Linnie Blooms Mini Journal. I was able to use techniques that have proven reliable for me. Layers of paper and gel medium, painted trim and details, ink and stencils, gelato color sticks and lots of stickers and assorted souvenirs.

Now that I have really tried them out, I am anxious to do more. I can see all sorts of possibilities for these little keep sakes. Cherished memories, a collection of techniques, pages commemorating special times and people in our lives.  Perhaps a technique class is in order to share what I have learned here...
I hope you have enjoyed my designs for Linnie Blooms. I am taking a break from the design team to work on art work for summer art fairs that I have signed up for. If you like what I have been doing, would like to learn more and try some for yourself, let me know and I can help you. My home studio class room is ready and waiting for YOU!
Best wishes!
Linda Kay
My website ~ www.lindakaysart.com
& Be sure to visit Linnie Blooms for more Mixed Stitch Media products and ideas.
Linnie Blooms ~ www.linnieblooms.com
Linnie Blooms blog ~ www.linnieblooms.blogspot.com


Saturday, March 29, 2014

Calling Mother Nature with a spring wreath


My wish...SPRING!
Oh spring, spring...where for art thou spring?

My little spring thing last week really didn't seem to have any effect on Mother Nature, so I'm trying again. This time, I'm making a wreath to grace the door and scare away the winter spirits.


First, I took a straw wreath and wrapped and wrapped it with this pastel variegated yarn.

Next, I took a Linnie Blooms canvas bloom and made a cut in it to the center.  I colored it with gelatos and spritzed with water so I could spread the color with my fingers.  These new spring blooms come in 2 sizes and I colored 5 of each size for this project using all shades of pinks and orange.  Some blooms have lots of color, some are more natural in the center and just colored on the edges.  Some are more pink, some are more orange.  A flower hodge-podge!


Once dry, I dripped some  hot glue onto one section next to the slice...


and overlapped the adjacent petal to give the bloom some curved dimension.


Next, it's painting time!  I painted these ADORABLE Easter shapes and letters from Unique Laser Designs.

I "marble-ized" the solid egg and bunny by blending gelatos over the dried acrylic paint and then splattered the letters with pink paint after covering them with a few thin coats of Distress Stain Picket Fence.


I added some seed beads to the center of the blooms and then tucked the blooms in with the wood shapes, a burlap ribbon, and some twisted paper leaves (attaching all of them to the wreath with hot glue).


This is my ode to spring.  Mother Nature are you listening this time?
~Kelly

Pin It