Showing posts with label Linnie Blooms. Show all posts

Friday, October 23, 2015

Falling Leaves Bookmark by Gail Green

Linnie Blooms products make the perfect canvas for any inspiration!

What better way to enjoy the crisp autumn air than taking some time for yourself to just…be!  This is the perfect time to take a walk and soak in all the colors of autumn and nature or just curl up with a hot cup of tea and a good book.  

Whatever you choose to during this changing season, make sure to include some creative time.  Only have a few minutes to create?  No problem!  This bookmark is so quick and easy to make, you will still have lots of time to take a walk AND read your book!


SUPPLIES:


Linnie Blooms Canvas Die Cut Leaves Set
Linnie Blooms Pre-Sewn Canvas Bookmark
Linnie Blooms Feathers Stencil and Mask Set
Clearsnap, Inc.: Colorbox Stephanie Barnard Sprays (Sky, Banana, Tangerine, Chocolate)
                          Archival Dye ink pads (Glacier Lake, Mudslide)
                          Art Dauber
ILoveToCreate: Tulip Fabric Marker (Black)
                          Aleene’s Tacky Glue
Optional: Can use cosmetic sponge instead of Art Dauber, if desired


INSTRUCTIONS:

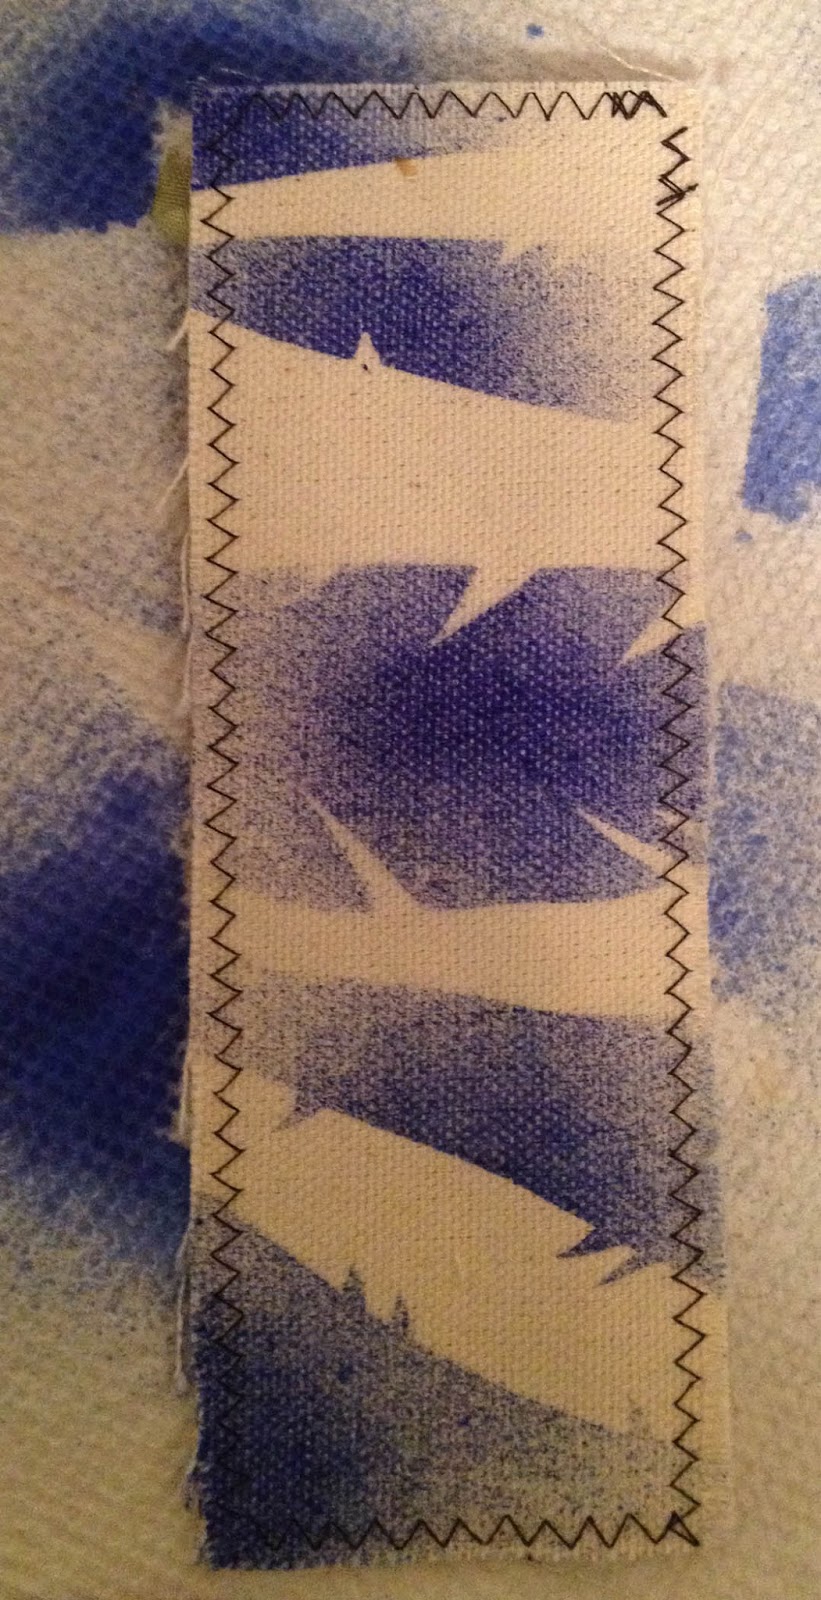
  1. Position stencil and mask pieces widthwise across the bookmark. Spray Sky. Move stencil and mask pieces; blot off ink, as needed.
  2. Reposition stencil and masks, as desired.  Using direct-to-paper technique (DTP), apply Mermaid.  Remove stencil and mask pieces. Dry completely. Repeat steps 1 and 2 on reverse side of bookmark, as desired.
  3. Spray leaves using Banana and Tangerine.  Blot. Lightly spray chocolate in drops over small sections of the leaves. Repeat on reverse side of leaves.

  4. When completely dry, draw leaf veins with fabric marker.  Attach to bookmark with Tacky Glue.

Monday, September 14, 2015

Linnie's Laundry

Hello,   it's Ann from the Design Team blog here at Linnie Blooms with a fun and easy painting project.  Here is my small cloth bag that is just the right size for someone to use to carry the essentials (such as coins, some detergent, and maybe a few dryer sheets) on their trip to the laundromat.  I was thinking of the college students away from home who must still have clean clothes!


I used one of the "NEW" Linnie Blooms Patterns called "Laundry Day" (Available here) by downloading , scaling the image down by 60%, printing onto paper and tracing it with some carbon paper onto the cloth bag.  The bag is actually from Linnie Blooms and once held Canvas Shapes (Like these).


First I printed the image onto plain copy paper.  I inserted a piece of cardboard into the cloth bag.  I placed a sheet of carbon paper over the cloth bag, and laid the print over that.  I then traced the image with a pen.


Tho colour the image I used a piece of plastic packaging left over from some products as a palette. I used the Gelatos as a pigment which I coloured onto the palette and turned them into water colour paints by adding some water.  I then used a small paint brush and painted the images.

The supplies used:
Faber Castell Gelatos (Banana, Blueberry, Red Cherry, and Brown)
Linnie Blooms Cloth Bag
Linnie Blooms Pattern "Laundry Day"

Please come check out the other projects I make over at my blog here: http://annmakes.blogspot.com.
Thank you for stopping by.

Friday, August 21, 2015

Blue Bird Holiday Card


Hello.  Ann here today with some early Holiday Season inspiration.  I know that the weather is so nice now it is hard to conceive that the Holidays are coming, yet they will be here sooner than we realize.  So while we are having a heat wave in my neck of the woods I am working inside my air conditioned house designing Christmas cards.  So here is my card:


To make this card I used a pre-made white base card (5 x 6 1/2), and some scrapbook and card stock papers as layers (5x6 1/2, 5x 6 1/4, and 4 5/8 x 6 1/4).


 The focus of this design is the Blue Bird (I was inspired by the Blue Jays that are usually flying around in the winter here).  The bird is a canvas die-cut by Linnie Blooms.


I used some Gelatos (creamy acrylic water soluble pastel) in a bright blue, a Teal, and a White.  With some water I smudged the colours with my fingers into the canvas.


I made the birds eye with some Puffy Fabric paint in black and a faux black rhine stone.  I made the branch by using the stencil (also from Linnie Blooms), a faint pencil tracing and filling in with some more of the black puffy fabric paint.


 Once the black paint was dry I distressed it with some white Gelato pastel. I added three light green leaves in more Gelato and glued on some red glass seed beads.


 I made the snowflakes from white paper and a punch, and glued the flakes to the card.  The sentiment (which is so shiny the camera did not make it out) reads Merry Christmas.  I made that with a good old Peel-Off sticker I had and a piece of white scarp of Card Stock die cut with a Little B die.

The supplies I used:
Linnie Blooms Bird
Linnie Blooms Stencil "Flutter"
White pre-folded card Recollections (Michaels)
Card stock in Dark Blue (scrap from my stash)
Metallic Scrapbook paper scraps in Light Blue, and White (From my stash)
Little B™ Die "Party"
Snowflake punch
Red Glass Beads (MultiCraft)
Puffy Fabric Paint in Black (Craft Medley--MultiCraft)
Black Rhinestone (Dollarama)
Gales by Faber Castell (White, Teal, Blue, Green)
Double sided Adhesive Tape (3m)
Aleene's Tacky Glue


To see more of my projects and how to's, please come over to my Blog at www.annmakes.blogspot.com.    Thanks for stopping by.


Monday, August 3, 2015

Art Journaling

Hello, it's Ann from the Design Team here at Linnie Blooms and from the blog at http://annmakes.blogspot.com.  Today I am showing you a couple of pages I have played with in my Linnie Blooms Journal.


I used some bright colours that make me happy and feel like summer:


I covered the first page with a coat of white Gesso, let that dry and then had fun with some spritzes of colour.  I sprayed on some colour ,added a few sprays of water and let it drip!   I just played with that technique until i was happy with the result.  I let the paints dry and then used a stencil with some black craft paint for the silhouette.   I stamped the quote onto a scrap of vellum and adhered it to the page with some sealer.


The second page was actually done first and I left the canvas unprimed.  I dabbed some fluid acrylics through a stencil for the background.  Then I played with a damp brush through the remaining paint on the stencil.  When the paint was dry I used a rubber stamp with some black ink and stamped the cat.  I went over the cat image with a black pen to cover any spots that were too light.  The eyes were coloured with a metallic green marker.  The quote is a clear sticker that I had in my stash for the longest time.  I used some extra sealer to make sure it would stay stuck to the page.


I hope that you are inspired to play along in a journal too.

Thanks for stopping by.
Please come over to my Blog at: http://annmakes.blogspot.com and my YouTube channel to see the other projects I am working on.

Supplies:
Linnie Blooms Mini Mixed-Stitched Book
Page 1:
DecoArt® Media™Misters in: Primary Magenta, Primary Cyan, and Primary Yellow
DecoArt® Crafter's Acrylic ™Paint  in Black
DecoArt® Stencil Andy Skinnner 6"x6" "Vogue"
Stamper's Anonymous Tim Holtz stamp "City-Central"
Page2:
DecoArt® Media Fluid Acrylics™in:  Cobalt Teal Hue, Quinacridone Magenta, Hansa Yellow Light
Stamp (my stash)
Ranger's Archival Black Ink(used ion both pages)
Faber Castell Black Pitt Pen
DecoArt®Americana stencil 6"x8" "Daisy Chain
Quote Sticker (my stash)
Respect Green Metallic pen
Decoupage by DecoArt® glue-Sealer-finish (used on both pages)

Monday, July 27, 2015

Canvas Sunflower- Mini Album Cover Embellishment


This little denim album was one of those projects (and we all have them) that got left incomplete and abandoned when creativity took me in another direction. I didn't know how to embellish it so I moved on and it remained unfinished.  When I made this canvas sunflower, I knew it was the perfect finishing touch. Let me show you how easy it is to make.

Directions:
1. Coloring the Canvas- Iron all the canvas pieces. Prepare your work surface & protect your hands with disposable gloves. Place the canvas sunflowers on your craft matte or newspaper. Using a sponge applicator to apply Distress Ink to color the sunflower and apply strong pressure to allow the ink to absorb into the weave of the fabric. Remember to color both sides of the canvas flowers as they will be folded to construct the 3D flower. Set flowers aside to dry thoroughly or give them a bit of help and dry them with a heat gun. Color the canvas leaves with Distress Ink. I suggest applying multiple shades of green & yellow ink to the leaves unevenly (aka splotchy) in order to give the leaves a more realistic appearance.

2. Stamping the Design-
Use permanent ink to stamp a background pattern to the canvas sunflowers and leaves. Remember to stamp details to both sides of the canvas flowers as they will be folded to construct the 3D flower. I used a wood grain stamp to cover the petals.

3. Folding-
Fold the sunflower canvas in half and press with your fingers while holding it for 20-30 seconds to set a mild crease in the canvas. Next, fold 1/3 of the folded sunflower over to form a small petal. Repeat the process of folding for the remaining two canvas sunflowers. You should have three identically folded pieces which when laid side by side form a complete circle.
 

4. Sewing- Use a needle and thread to tack the fold at the center and stitch it securely to prevent it from unfolding. Repeat the process of securing the fold for all three canvas sunflowers. Next, begin stitching the petals together at the center point to form the sunflower. There is no need to overlap because the three segments will form a circle when joined. Finally, embellish the center of the sunflower with a button and attach the canvas leaves to the underside of the sunflower. If desired, sew a ladybug button on the sunflower.

5. Inking the Edges- When the sunflower is stitched and assembled, use a sponge applicator to apply Vintage Photo Distress Ink to the tips of the petals to add depth and dimension to the sunflower.

6. Assemble the Project- Glue or stitch your sunflower to embellish your chosen item. You may embellish a candle holder, gift bag, hat, journal cover, etc.

 A Closer Look:
 

Linnie Blooms Supplies:
canvas sunflowers, canvas leaves
Other Supplies: Distress Inks (Peeled Paint, Mustard Seed, Vintage Photo, Spiced Marmalade) -Ranger, sponge applicator, StazOn brown ink (Timber Brown) -Tsukineko, woodgrain clear stamp (Architectural Accents) -Tattered Angels, Papermania leaf clear stamp -Docrafts, wooden button, needle & thread, glue gun, iron

Stop by Linnie Blooms to see the amazing selection of canvas
die cuts and don't forget to follow Linnie Blooms on Facebook.

Visit me HERE

Monday, July 20, 2015

Sponged Nature Hanging


I LOVE inky techniques!  And...I especially love to try inky techniques with Linnie Blooms' awesome pre-sewn canvas products!

I was inspired by all the GREEN and SKY and foliage around my neighborhood and decided to create this cheerful little wall hanging, using the items below:


I just LOVE Linnie Blooms picket fence, tree, 5" x 5" blank square, heart, miniature clothespins and Shabby Trim!

...and that little yellow button added just the special touch of sunshine to the project!

In addition to these items, I also used these additional supplies:

Clearsnap, Inc: Archival Dye inkpads (Wicked Black, Mudslide, Glacier Lake, Moody Blue, Tree Frog, Grasshopper, Pinetree, Squash, Pumpkin Pie, Fireberry)
Clearsnap, Inc:  Color Blenders
Beacon Adhesives: Fabri-tac Permenent Adhesive
Needle and thread
Scrap paper
Scissors

INSTRUCTIONS:

Begin with the background.  Draw a scalloped edge on the scrap paper and cut out. to create a cloud stencil.  Place the stencil just below the top edge and gently sponge both blue inks along the edge.


Move the stencil down and angle slightly.  Sponge ink again along the edge.


Continue until the entire square is covered in clouds.  Aren't they adorable?! This one of my favorite inky techniques...and now you know how easy it is to do!


Next we will do the pieces. Using a technique called "direct-to-paper" (DTP), add  Squash and Pumpkin Pie to the fence.


Cut out  a small section in a paper scrap as shown below. This creates a "mask", which only exposes the area in which we want to add ink.  The remaining areas remain covered.


Place over the fence and dab Mudslide along the edge. Move the paper as needed and continue for each fence post.


It should look like this when you are done. Pretty cool, eh?!


Tree and heart are next.  Now that you are so skilled using a simple paper mask, sponge the tree trunk in Mudslide and then move the paper around and sponge the three greens on the leafy parts.


Simply add Fireberry to the heart using the DTP technique.  (Look how many cool inky techniques you are learning!!)

When dry, sew  the cute yellow button onto the heart.


And now to the cool assembly.  I wanted to add a 3-D vibe to the hanging so I folded and pinched the tree and fence before gluing....just like this!


One more step... Use DTP along the edge of the Shabby Trim to add a little Pinetree grunge.


Now glue all the pieces onto the cloud background....clip the trim onto the hanging when dry!  


Wednesday, July 1, 2015

Happy Blossoms Notecard by Gail Green


MATERIALS:

Linnie Blooms Stitched Greetings Clear Stamp Set
Linnie Blooms Canvas Die Cuts: Large & Small Flower and Small Leaf
Linnie Blooms Card Kit

Sakura: Micron 05 Pigment Pen (black)

Clearsnap Holdings: Donna Salazar's Mix'd Media Inx® (Jasmine, Pewter, Mossy, Peaches)
Clearsnap Holdings: Colorbox® Archival Inkpad (Wicked Black)

Beacon Adhesives: Gem-Tac® Permanent Glue 

Miscellaneous:
      Acrylic Paint of your choice (white, coral, green or colors of your choice)
      Acrylic (or other) stamp mounts
      6mm Plastic Gems (black)
      Paperclips (regular and jumbo)

INSTRUCTIONS:

1. Using DTP, apply black ink to entire card front; dry completely. Place a jumbo paperclip along one edge to hold card flat. Stamp phrases on the card in Jasmine, Pewter and Peaches. 
     NOTELet ink dry for a subtle effect OR quickly sprinkle on clear (or colored) embossing powder and heat. 


2. Apply Jasmine and Mossy direct-to-paper along card edges. Set aside; dry. 


3. Apply a coat of white acrylic paint to large blossom; dab coral around the edges. Apply coral paint to small flower and green to small leaf. Dry completely.

4. Using Micron pen, draw faux stitches around petals and leaf, as shown; dry.


5. Pinch and shape flowers and leaf. Glue small flower onto large flower. Glue small beads onto center of flower; dry completely. 


6. Cut a 2-3/4" section of LB Textured Burlap. Fold over top edge 1/2"; press to crease. Cut angled edges on both sides, cutting from bottom up to folded edge as shown. Glue top fold along short edges; hold in place with paper clips until dry. 


7. Glue flower, leaf and burlap "flower pot" onto card, angling as desired. Dry completely.