Sunday, December 15, 2013

SnOwFlaKEs

SnOwFlaKEs
by Kelly Hoernig for Linnie Blooms

The snow is finally here and I love it. It creates such a winter wonderland of everything transforming to white and wintery. The air changes, the moonlight makes all sparkle and I can get lost in thoughts dreaming of this special season. So, that is my inspiration for this piece, snowflakes of all sizes and shapes.  I worked with Linnie Blooms shapes such as the long blank, hearts, banners, a pocket and a rectangle. You will need to gather stuff from here and there to add to the charm of this little treasure. There are buttons, a piece of ribbon, a candy cane of wire and a couple pieces of scrap batting. Have fun and make this delightful snowman your own.


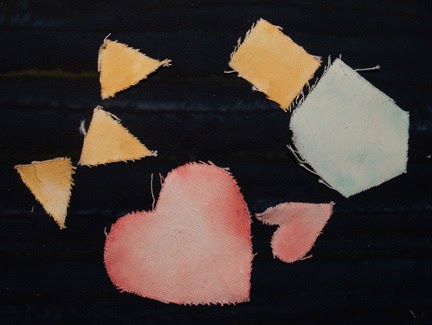
I used DecoArt Americana acrylics in Camel, Sea Glass, Terra Coral and Violet Haze to create this exact look. I like to spritz water onto each shape before applying a watery coat of color. It allows the paint to move and gives you a bit of dimension and texture without the work. I pulled out my favorite snowflake stencil to add some flair to the background and the heart. The stencil is applied in the same color, it only appears darker because it is more concentrated. Because I wanted to add depth, I used fabri-tac and another piece of batting glued to the backside of the pocket. It makes it stand up just enough giving you the look of things being filled in it. I then used fabri-tac to glue on all the additional elements.

Can’t wait to see what creative twist you put on this inspiration – hope you will share it when you are finished! Enjoy and Happy Holidays from me to you!!

Saturday, December 14, 2013

Star Garland

Star Garland ~ a Linnie Blooms Creation

*  Twinkle * Twinkle * little star…

I'm a Linnie Blooms Design Team Member!
It’s time for another Linnie Bloom design using their wonderful canvas shapes. I wanted to create a garland to hang on one of my wreaths. Be sure to click on the small photos to see all the details of each step.
close up
Linnie Blooms Stars
I started with the Primitive Stars that are available here on the Linnie Blooms Shop & Create website. You get 4 pieces, 2 large stars and 2 small stars. I used 3 large stars and 2 small stars for this project.
I gathered my supplies:
Linnie Blooms canvas stars (2 sets), my Gelatos Color Sticks in gold, yellow and metalic gold, Tacky Glue, Amaco Art Emboss Colored Foil in Bright Gold, 18″ of Christmas star wire garland (mine is from Hobby Lobby), mini star sequins, gold glitter glue, scissors, stylist, hog hair brush, craft foam sheet (for embossing) & paper or teflon craft sheet to protect my table.
coloring stars with Gelatos
color progression
I started off by coloring in the stars with the warm gold Gelato color stick, then layer on a good coat of the yellow and finally a few rubbings of the metalic gold around the edges. With my damp hog hair brush, I worked the paint into the canvas shapes until I was pleased. Not too much of the metalic gold as it made it muddy.
blend with wet hog brush
leave top of star unglued
Again the canvas shapes curled up, but this time I wasn’t worried about it. I let them dry and then glued them onto the gold craft foil, leaving enough space between each start to add a generous boarder around each. I forgot to get a photo but you can see what I did in the next photos.
glue stars to foil for backing
close up
I applied glue to all but the top star points and placed them on the back side of the foil to create a stiffer backing. After smoothing them out, I let them dry for a bit and then cut them out. Be careful when handling the foil as it can be sharp. I actually got a small sliver of foil under my skin. Ouch!
close up
fold foil back
I arranged the stars along the star wire garland and open up the back side of each top star point. This is why I left it unglued ~ clever! ; )
Glue and rub the foil around the wire, pressing out excess glue and wipe clean.
embossed detail
I then place my garland onto a craft foam sheet and used my stylist to emboss some simple straight lines around the foil boarder to add some interest.
I added a few tiny star sequins to the center of each star with the tiniest bit of glue. And some final bling with the gold glitter glue around the edges of the canvas star shape.
It dryed over night and after making some simple hanging loops at each end of the wire, it was ready to hang.
on my wreath
It goes very nicely with my holiday decor colors of gold and multi colored lights.
close up
Fun and funky!
A bit of primitive mixed in with the traditional adds just my kind of style.
* twinkle * twinkle *

*Twinkle * Twinkle*

Merry Christmas and happy crafting!
Linda Kay
Remember! You may use this 10% discount code on purchase made on the Linnie Blooms website for a limited time. Be sure to use this special code LB2013LK at check out.
Linnie Blooms website ~ www.linniebloom.com
Linda Kay’s Art website ~ www.lindakaysart.com
Linda Kay’s Art blog ~ www.lindakaysart.com/blog
Linda Kay’s Art on Facebook ~ www.facebook.com/LindaKaysArt

Friday, December 13, 2013

Hearts Fell

Hey there, it's Kisha here again to share another scrapbook page using Linnie Blooms canvas shapes

How many of you have gotten a good start on your December Daily, or what I would prefer to call Christmas memories album?  Well, I've been more busy than creating, but I am packing away the notes and pictures to complete my mini album. Today I want to share with you my first page, which is actually not "December" but November 29th.  This is where my December daily will start...you can follow along this journey and get more details on my blog.


I so love these glimmery hearts! The shape is so whimsy and fun, and I think the glimmer of the hearts make them stand out on the page.


This page will be mostly journaling.  It will hold the notes from all of us about the surprise we received.


It's so easy to alter the canvas shapes, and it takes on mediums and inks very well.  The canvas also holds the inks true to color, this is a major plus when using canvas in mixed media projects.
I love how the multi colors of the glitter I used actually shows up on the canvas. When creating your holiday memories, think outside the box when using shapes and images.  Give canvas shapes a try, this will definitely add more texture and dimension to your scrapbook pages and altered items. Also, it's such an easy material to work with that will add lots of movement and texture to your projects.

Below is a picture of the actual heart canvas shape I used, it comes in three different shapes and they pair wonderfully together.


Thanks for stopping by today.  I hope you have been inspired to create with canvas.

Kisha

Thursday, December 12, 2013

Fun with shapes on a Blank.

One of my favorite products to play with is the Linnie Blooms Blanks.  Today I am showing how I did a layout by using one of the long blanks.  Super fun to play with.  This is going to hang in my craft room for now.. then my daughter wants it in her room.

I used a total of 7 of  the mixed media canvas shapes from Linnie Blooms.    I love how when using that many of one product you really don't loose the focus of the photos, everything blends well, and doesn't seem to take over the layout.

I used a long blank, book mark, linnie white textures, 3 banners, 1 house/arrow, and a heart. 


I love using this shape.. one of my favs.
Use this as a house or an arrow
Long Blank Layout w/ 8 Linnie Blooms Products

some of the supplies I used
 Did you know that you can be a CREATIVE REP for Linnie Blooms?  This is a very new program and you can sign up and get started introducing your friends to all of these wonderful products.  We specialize in one of a kind Mixed Stitched journals, Mixed Media Shapes, Long Blanks, and more.  Sign up to become a rep or check out our website for more info. 

I love playing with these products and it's the only way I can get the product is to become a Creative Rep.  The start up kit is awesome~
Kimberly, Scrap It Girl
Linnie Blooms Creative Rep & Design Team Coordinator

Wednesday, December 11, 2013

Seeing Stars

Ever see stars, like really pretty stars? Stars in the hues of red, white and blue are the most beautiful stars ever.

Well, I'm seeing stars again as I'm pulling out pictures from my son Naval graduation in an effort to get caught up on his journey.


For this LO I used Linnie Blooms canvas stars and Textures to create a mildly nostalgic look. To distress the stars, I very simply used color mist for the red and white star. The blue star was colored with silks mixed with a little water.


I adhered the stars with just a little liquid adhesive, so they would still have the look of movement. If you like the look of a more flat canvas shape, I suggest adhering it to card stock for added weight. Now I usually prefer the fringed edges and rustic look of canvas. But for those that create with more clean cut lines, please do not think creating with canvas shapes is not for you. Another tip for clean edges of your canvas shapes, use a liquid adhesive like Mod Podge, Elmers, or any clear drying white glue to both sides of your canvas. This will guarantee clean edges every time. The LB Textures was cut into strips and added to various corners, and I also added a medium in stucco for more texture. A bit of stucco medium was also added to the stars also, you can never have too much texture. Please stay tuned, I will be back shortly with more to share. Kisha

Monday, December 9, 2013

A Sparkly Christmas Garland


Hi, I'm Candy Spiegel and I am so excited to be a guest designer for Linnie Blooms Designs this month!

I created a Christmas banner and started with primative stars. They began as a blank slate, like this ...
 I wanted to try some airbrushing techniques with the Copic Airbrushing System. Since that technique uses air to apply color, your pieces will fly all over the place. To hold them in place I used Removable Glue Dots to hold them to a scrap sheet of paper while I applied the color.

 I used Y18 for the stars.
Next came theCanvas Evergreens. I used Washi Tape to mask off the trunks while I sprayed the tops of the trees.

 I used YG63 and YG67 for the trees. I colored the entire top with the lighter color. Then, I went back and did stripes in the darker color to mimic the branches and depth in the tree.

Then I covered the trees and used E44 to color the trunks.
 For the stockings, I taped off the top portion and then used R46 to color the base. Red is not a nice color. It does not play well with others and it goes everywhere. I learned I should have taped off the entire top of the stocking, not just a few strips!
 Then I taped on a stencil by The Crafter's Workshop. I colored it with R89.
Once it was dry, I covered the top portion with Art Glitter Designer Dries Clear Adhesive and then added Fun Flock. For the stars, I covered the entire top with a thin layer of glue and added glitter over the top.

Once the flock dried, I sewed some gold twine to the stockings and then added a little bow. I also used the Tiny Attacher to make little staple "x's" on the tops. I used Stickles to add garland to the trees and then Robin's Nest Dew Drops for Ornaments. Here are my completed pieces ...
 I wanted one more piece for the middle, so I cut out a chipboard reindeer and covered it in paper. Then I added some greenery and a few Stickles for berries.
 To hook the pieces together, I used jump rings. On the middle jump ring, I added a few tiny jingle bells.

The jump ring can easily pull out of the fabric on the trees. To prevent that from happening, I applied a bit of Art Glitter Designer Dries Clear Adhesive to the back of the tree with my finger to prevent any fraying and make it strong enough to hold the jump rings on the delicate branches.
Then, I used another jump ring at the end to add some ribbon to hang the banner with.
And here is the finished banner ... I hope you like it and I hope it inspires you to create a banner of your own!


Sunday, December 8, 2013

Shiny Stars

Linda here to share with you another Linnie Blooms canvas shape - Stars!  Our star sets come with 2 small and 2 medium primitive canvas stars.

And here's a project that my friend Therese Hennessy created with a Linnie Blooms large canvas stocking and our stars.

Therese colored the entire stocking with Gelatos and water.  Once dried, she added some background texture with ink and stamps.  

Then it was time for the stars to get all gussied up!  Each star was colored with Gelatos and water.  Once dry, she used Stickles to add just the right amount of glimmer!  
This is sooooo Therese!  

If you get a chance, take a moment to stop by Therese's website Polkadotsandmore!  It's a brick and mortar store that Therese owns and she has plenty of how-to videos on her site as well!  
Thank you Therese!